Things I Learned - 3D Printing
Previously i wrote about specific features and your first print with the Monoprice MP Select Mini 3D Printer. This time i want to write more about common problems that i encountered when i was just starting out. Also things i learned as a beginner with my 3D printer.
Things I Learned - 3D Printing
https://youtu.be/j6w1Vo5Q2hs
First i need to quickly explain how it all works; how you go from a 3D file to a printer part.
You can go online to sites like these:
Thingiverse
Popular, parts can be categorized for your printer, simple basic parts to print
Yeggi
Similar to Thingiverse, lots of files available
Pinshape
Mostly same stuff as the above, with some more detailed 3D parts.
My Mini Factory
Similar stuff as above.
Dremel 3D Idea Builder
More detailed parts than Thingiverse
Autodesk123D
More detailed parts than Thingiverse. Things that aren't necessarily designed for 3D printing.
GrabCAD
Again, not necessarily designed for 3D printing. They have stuff like a complete car, or like below, a super detailed engine and all the parts.
You Magazine
More detailed parts than Thingiverse
On those sites you can download anything someone had drawn in 3D. Usually the files are saved in the format of .STL or .OBJ. There are other 3D formats like .DWG for Autodesk123D (AutoCAD) files. But remember you can only print something as big as your print bed. Yes you can always cut the model in the slicer programs, but just because you see a cool Star Wars helmet, doesn't mean you can just go and print it. You can always scale parts down though. Another option is to draw the 3D object yourself with programs/websites like. I will go over this in more detail later, showing you exactly how to import, export, and draw your own parts quickly and easily but very briefly, here's an overview of some 3D printing software: TinkerCad
Web-based - No download needed, intuitive and easy to use, comes with quick and easy lessons. I think that this is the best program for beginners.
SketchUp
Used to be owned by Google, very popular, tons of support, quick and easy to get started
Sculptris
Fun and easy program, perfect for sculpting faces with it's symmetry feature. I used this to fill in holes when i scanned myself with an XBOX Kinect camera.
3D Slash
Easy, basic program where you add or blow up boxes to design the part you want
MeshMixer
Free download, from Autocad, somewhere between TinkerCad and the full AutoCad program. But you can customize your support structures.
I remember reading where someone said, you won't really be able to fully utilize your 3D printer until you are drawing your own parts and printing them. And that's kind of true. Sure it's fun to download little object and print them off, "Hey i just got finished with a print that took 2 hours, of something you can buy at Dollar Tree." But lets say that a bracket for your washing machine breaks, or a mounting arm for your GPS snaps. And you go online and either that part isn't for sale, or you have to buy the whole assembly, which cost $80. Then if you are able to quickly draw and print the part yourself you are really getting the most out of your printer. You are then moving into the rapid prototyping 3D printing service game. Suddenly you are able to make anything you can think of. Anyway, i said i was going to quickly explain didn't I? I lied. The next step after you have your 3D file is to convert it to .gcode. GCode is the set of instructions that you specifically tell YOUR 3D PRINTER, how to print. Meaning how hot the extruder needs to be, where to move, how fast to move, how much to extrude and retract, how fast to retract, and on and on and on...
Using the settings in a slicer program you take the 3D .STL file and tell it all the information.
Some popular 3D printing programs are:
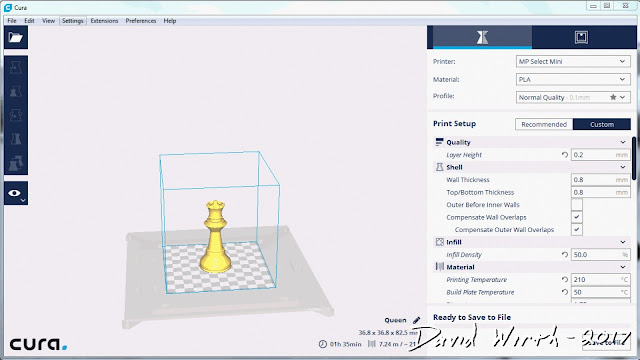
Cura
Made by Ultimaker, lots of support, version 15 is good for beginners, version 2.3 can have much more detailed settings
More complicated, good for more experienced printers that know how to tweak settings
Simplify 3D
Cost $150, some people prefer it and like it's features and how it prints, has preset Low, Med, High quality settings
KisSlicer
Another open source program with lots of features I will explain all about settings in a later blog post and video, since it is one of the biggest issues people have.
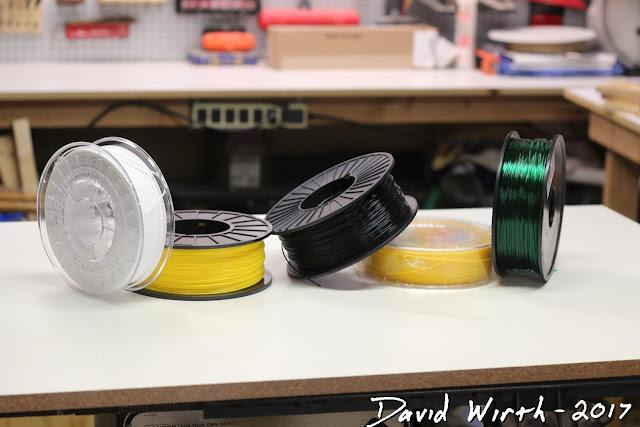
But you add the part then tell it all these different settings you want, then save it as .gcode. You then save that onto your MicroSD card, load that gCode into your printer, press start and hope everything goes well. With every print you constantly tweak your gCode settings to try and produce better and better prints. And save your settings for each print, then update slower/faster, hotter/colder, etc. But beyond just the 3D printer settings there are lots of things you need to know when you are starting out. First is what material or Filament you will be printing with. The most common filament is PLA. This material is easy and forgiving to print with. It does not require a heated bed and prints at a relatively low temperature, usually around 200 deg C. It's great for beginners and great to print with and get good results. But with all materials there are also negative aspects. PLA is brittle, meaning it will not bend before breaking, it will just snap or shatter. ABS on the other hand is very bendable. It isn't relatively strong. Nylon is typically double the strength of PLA. Then there's PETG, TPA, etc. Again, filament material is worth a totally separate write-up. I will go over all the different filaments, pros, cons, ease of printing, uses, and what to look for.
One thing that the don't tell you is what tools you need to use. Tools for cutting, moving, scraping, prying, and sticking. The most useful tool i have are a pair of tweezers, technically called a hemostat.
I use these for every print, picking off stray filament or when filament clumps on the nozzle. A pair of small wire cutters, or even better are flush-cuts. These are good for trimming the filament and the flush-cuts are great for cleaning up clumps on the printed part.
It's also nice to have different sorts of needle nose pliers, small pliers, trimmers and wrenches. Little hand tools like this and specific allen wrenches that fit your printer are necessary for making little fixes and adjustments.
Obviously for the MonoPrice Select Mini 3D printer you need the little allen wrench provided for adjusting the bed level too. It's also good to have rags, paper towel, Q-tips and things for cleaning up the extruder nozzle and things. The last important set of "tools" you will need, deal with bed adhesion. A huge topic of discussion is how to get filament to stick to your print bed. Some materials like PLA are easy, they stick to most anything pretty well. But some materials like PETG are more difficult. That's why i have blue painters tape, Elmers white glue stick, AquaNet hairspray, Acetone (nail polish remover), and glass cleaner.
Original clips i used on my first glass print bed.
The best thing i've found to get good adhesion is a glue stick. Once the print bed has heated up i've used Elmers white glue stick, wiped it on a few times and the PLA or PETG sticks like crazy. It sticks almost too well and can be sometimes difficult to remove.
After settings, getting good layer adhesion is one of the most discussed topics. Everyone has their own thoughts and opinions on what is best and what works for them.
My thoughts are if you are just starting off, use blue painters tape. It works fine, add the tape, trim it with scissors, wipe on some acetone and you should be fine. If you print with PETG and notice that it isn't sticking, then use the glue stick.
Then once you print more and get sick of replacing the tape, you can try adding a glass print bed.
The nice thing about the glass bed is that it's removable. You can take it to the sink and clean all the glue stick or hair spray off, then clip it back in place. The last thing that i learned is about filament storage. Lots of people discuss the importance of keeping filament dry and away from moisture. This is extremely important with filament like nylon which is hydroscopic and needs to be dried in the oven or else it will absorb moisture in the air and pop when it prints. Other filaments like PLA, ABS, and PETG should be kept dry but it is not as critical as nylon. So to keep my filament dry and organized i have it in a clear plastic tote that i added silicone to the brim to keep it air tight.
Later i will make a separate write-up and video i made about the filament tote.
And like i said previously, i will later be writing in more detail about print settings, filament, etc.
Things I Learned - 3D Printing
https://youtu.be/j6w1Vo5Q2hs
You can go online to sites like these:
Thingiverse
Popular, parts can be categorized for your printer, simple basic parts to print
Also useful prints to upgrade your 3D printer.
Yeggi
Similar to Thingiverse, lots of files available
Pinshape
Mostly same stuff as the above, with some more detailed 3D parts.
My Mini Factory
Similar stuff as above.
Dremel 3D Idea Builder
More detailed parts than Thingiverse
Autodesk123D
More detailed parts than Thingiverse. Things that aren't necessarily designed for 3D printing.
GrabCAD
Again, not necessarily designed for 3D printing. They have stuff like a complete car, or like below, a super detailed engine and all the parts.
You Magazine
More detailed parts than Thingiverse
On those sites you can download anything someone had drawn in 3D. Usually the files are saved in the format of .STL or .OBJ. There are other 3D formats like .DWG for Autodesk123D (AutoCAD) files. But remember you can only print something as big as your print bed. Yes you can always cut the model in the slicer programs, but just because you see a cool Star Wars helmet, doesn't mean you can just go and print it. You can always scale parts down though. Another option is to draw the 3D object yourself with programs/websites like. I will go over this in more detail later, showing you exactly how to import, export, and draw your own parts quickly and easily but very briefly, here's an overview of some 3D printing software: TinkerCad
Web-based - No download needed, intuitive and easy to use, comes with quick and easy lessons. I think that this is the best program for beginners.
SketchUp
Used to be owned by Google, very popular, tons of support, quick and easy to get started
Sculptris
Fun and easy program, perfect for sculpting faces with it's symmetry feature. I used this to fill in holes when i scanned myself with an XBOX Kinect camera.
3D Slash
Easy, basic program where you add or blow up boxes to design the part you want
MeshMixer
Free download, from Autocad, somewhere between TinkerCad and the full AutoCad program. But you can customize your support structures.
I remember reading where someone said, you won't really be able to fully utilize your 3D printer until you are drawing your own parts and printing them. And that's kind of true. Sure it's fun to download little object and print them off, "Hey i just got finished with a print that took 2 hours, of something you can buy at Dollar Tree." But lets say that a bracket for your washing machine breaks, or a mounting arm for your GPS snaps. And you go online and either that part isn't for sale, or you have to buy the whole assembly, which cost $80. Then if you are able to quickly draw and print the part yourself you are really getting the most out of your printer. You are then moving into the rapid prototyping 3D printing service game. Suddenly you are able to make anything you can think of. Anyway, i said i was going to quickly explain didn't I? I lied. The next step after you have your 3D file is to convert it to .gcode. GCode is the set of instructions that you specifically tell YOUR 3D PRINTER, how to print. Meaning how hot the extruder needs to be, where to move, how fast to move, how much to extrude and retract, how fast to retract, and on and on and on...
Using the settings in a slicer program you take the 3D .STL file and tell it all the information.
Some popular 3D printing programs are:
Cura
Made by Ultimaker, lots of support, version 15 is good for beginners, version 2.3 can have much more detailed settings
This is the look of version 2.3
Slic3r More complicated, good for more experienced printers that know how to tweak settings
Simplify 3D
Cost $150, some people prefer it and like it's features and how it prints, has preset Low, Med, High quality settings
KisSlicer
Another open source program with lots of features I will explain all about settings in a later blog post and video, since it is one of the biggest issues people have.
But you add the part then tell it all these different settings you want, then save it as .gcode. You then save that onto your MicroSD card, load that gCode into your printer, press start and hope everything goes well. With every print you constantly tweak your gCode settings to try and produce better and better prints. And save your settings for each print, then update slower/faster, hotter/colder, etc. But beyond just the 3D printer settings there are lots of things you need to know when you are starting out. First is what material or Filament you will be printing with. The most common filament is PLA. This material is easy and forgiving to print with. It does not require a heated bed and prints at a relatively low temperature, usually around 200 deg C. It's great for beginners and great to print with and get good results. But with all materials there are also negative aspects. PLA is brittle, meaning it will not bend before breaking, it will just snap or shatter. ABS on the other hand is very bendable. It isn't relatively strong. Nylon is typically double the strength of PLA. Then there's PETG, TPA, etc. Again, filament material is worth a totally separate write-up. I will go over all the different filaments, pros, cons, ease of printing, uses, and what to look for.
One thing that the don't tell you is what tools you need to use. Tools for cutting, moving, scraping, prying, and sticking. The most useful tool i have are a pair of tweezers, technically called a hemostat.
I use these for every print, picking off stray filament or when filament clumps on the nozzle. A pair of small wire cutters, or even better are flush-cuts. These are good for trimming the filament and the flush-cuts are great for cleaning up clumps on the printed part.
It's also nice to have different sorts of needle nose pliers, small pliers, trimmers and wrenches. Little hand tools like this and specific allen wrenches that fit your printer are necessary for making little fixes and adjustments.
Obviously for the MonoPrice Select Mini 3D printer you need the little allen wrench provided for adjusting the bed level too. It's also good to have rags, paper towel, Q-tips and things for cleaning up the extruder nozzle and things. The last important set of "tools" you will need, deal with bed adhesion. A huge topic of discussion is how to get filament to stick to your print bed. Some materials like PLA are easy, they stick to most anything pretty well. But some materials like PETG are more difficult. That's why i have blue painters tape, Elmers white glue stick, AquaNet hairspray, Acetone (nail polish remover), and glass cleaner.
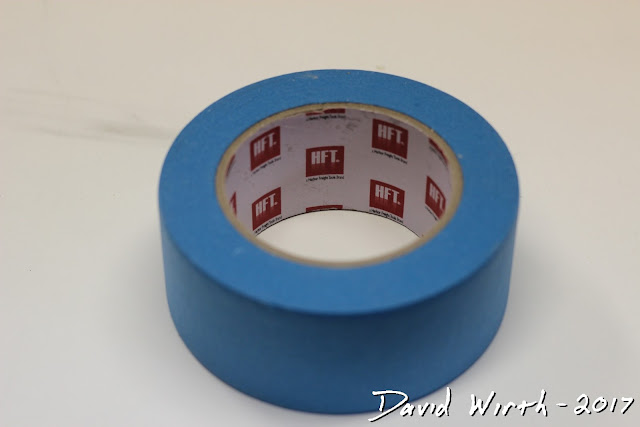
Cheap blue painters tape from Harbor Freight.
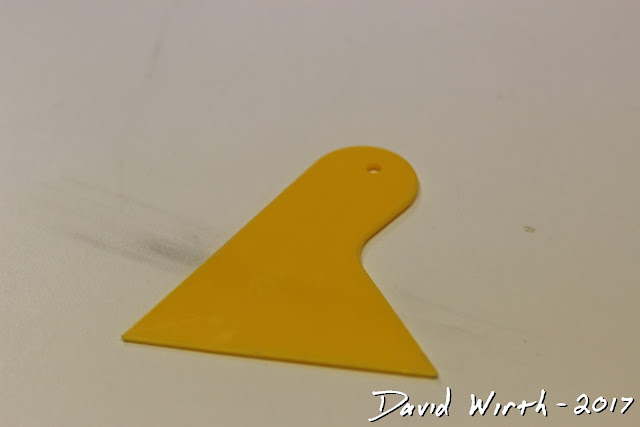
Plastic scraper that came with the printer.
MicroSD adapter and cable extender.
Nail polish remover.
Flashlight.
Everything including hand tools.
This depends on what your print bed material is. The MP Select Mini has a heated aluminum bed. For that, you can just stick on some blue painters tape. I've used the cheap Harbor Freight tape and it works fine, but i'm sure the $9 stuff from Home Depot works just as well. After adding the tape you can wipe on the acetone until the waxy coat gets a little tacky. The only thing bad with the tape is that after a couple prints it can bubble up and has to be removed and replaced.
I recently added a piece of glass over my aluminum print bed. I did a separate write up and video for doing that.
Glass Print Bed - For Under $1 - 3D Printer
https://youtu.be/vy30E6wJIz4Original clips i used on my first glass print bed.
I now use smaller binder clips so they don't get in the way. Also i use glass with the corners cut off so it's full size and i can still adjust the bed level.
But some printers come with a glass print bed as standard. The advantage of glass is that you can print directly to it, easy cleanup, no tape needed, better finish on print. For PLA i print right onto the glass and it sticks fine.
In this picture you can see how much glue stick i put down.
The nice thing about the glass bed is that it's removable. You can take it to the sink and clean all the glue stick or hair spray off, then clip it back in place. The last thing that i learned is about filament storage. Lots of people discuss the importance of keeping filament dry and away from moisture. This is extremely important with filament like nylon which is hydroscopic and needs to be dried in the oven or else it will absorb moisture in the air and pop when it prints. Other filaments like PLA, ABS, and PETG should be kept dry but it is not as critical as nylon. So to keep my filament dry and organized i have it in a clear plastic tote that i added silicone to the brim to keep it air tight.
Later i will make a separate write-up and video i made about the filament tote.
And like i said previously, i will later be writing in more detail about print settings, filament, etc.


No comments:
Post a Comment