Glass Print Bed - For 3D Printer
3D printers can come with different types of build plates. I decided to convert my Monoprice Select Mini to print on glass.
The most common build plates are aluminum and glass. The advantage of aluminum is that it's cheap, durable, and the heated bed cartridge can be attached directly to the underside.
To print on aluminum you need to have some type of covering like masking tape.
The advantages of a glass print bed is that it is perfectly flat (will not warp or bend), easy to clean, does not need any type of protecting tape, produces a super smooth shiny surface when printed on.
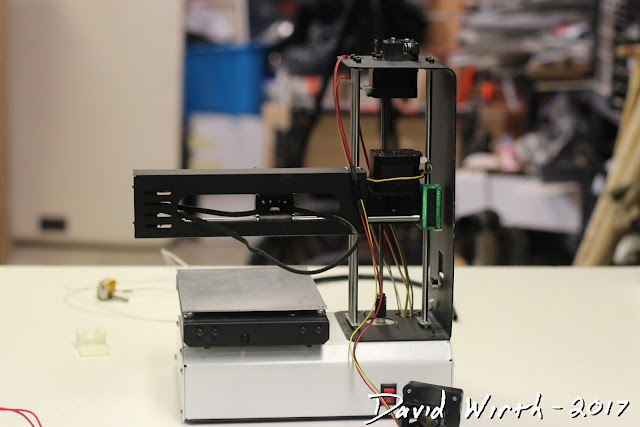
I have the Monoprice Select Mini and it comes with an aluminum build plate.
Which is fine, i printed several parts onto blue masking tape. It worked well and had fairly good adhesion. But i decided to install a glass bed, for a few different reasons. First i got sick of adding and removing the blue painters tape. Second i liked the idea of printing directly onto glass and being able to clean it up by running it under water in the sink. And third i was intrigued by the shiny surface when printed on.
In the very early days of 3D printing, people tried all sorts of different build plates, but glass and aluminum kind of became the standard.
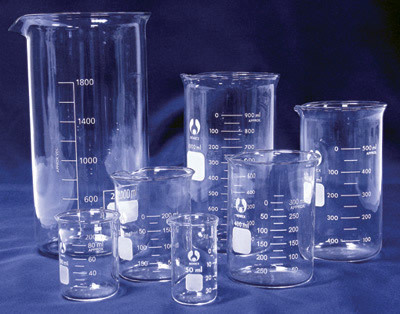
So what type of glass do you use. When you read about 3D printer glass beds and hear what people write about in forums, the name Borosilicate Glass comes up. Borosilicate glass is what's used to make test tubes and beakers for chemistry class (Pyrex). The advantage of this glass is that it can withstand very high temperatures. And since it is a 'Heated Bed', borosilicate glass is an obvious choice.
So i went on Amazon and looked for 3D printer glass beds that i could use. It turns out that everyone is charging a minimum of $20 for a sheet of glass.
Another option of boro glass.
I wasn't really happy with the idea of spending $20 for a sheet of glass. So i continued to read about other people's experience and learned all about what people have used in the past.
Here's a list of some of the different materials people have tried, other than just buying the borosilicate 3D printer glass:
- Mirror glass
- Window glass
- Tempered glass
- Frosted glass
- Heat treated glass
- Floor tile
- Marble tile
- Granite tile
- Aluminum sheet (may oxidize)
- 9h Glass laminate sheet protector for tablet (gorilla glass)
Here's another story i saw where someone said the 3D printed part stuck so well to the borosilicate glass that it took a chunk out when they tried to remove it.
When i heard someone say that they just went to the dollar store, bought a picture frame, and was successfully using that glass for their print bed, i knew that's what i was going to do. Before spending $20 i was going to try the cheapest glass i could find. The fear is that when the bed heats up, the ordinary glass might crack, but for $1 it was worth a shot.
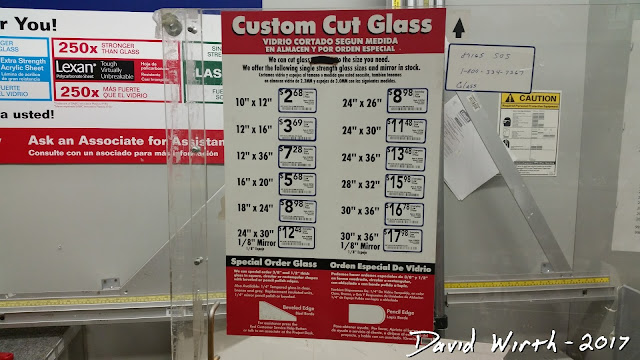
I actually ended up going to Lowe's and looked in their glass and lexan cutting section. It turned out that i could buy a piece of 10"x12" glass for $3.
But then i went to the back of the store and saw that they sold a 6 pack of 12"x12" mirrored glass for $10.
I figured that things weren't going to go perfectly and i should probably have some extras. Whether i broke a few pieces while trying to cut it, or whether some cracked during printing. So i bought the box. And it turns out that i only needed the glass to be roughly 6"x6", so i could get 4 pieces out of each sheet, which means i could get 24 sheets from the box. So i was getting 24 glass print beds for $10 ($0.42 per sheet) versus 1 print bed for $20, which is 48 times the price.
Also while i was at Lowe's i saw a piece of 12"x12" marble tile on the clearance rack for $2.
I decided to buy that too just for experimenting. And i also remembered that i had some old 12"x12" granite tiles in the garage from a project we did on our house. Both the marble and granite tiles had a super smooth shiny surface.
Leftover granite tile in the garage.
One big advantage of the stone tiles would be their ability to retain the high temps. With aluminum and glass the bed heater is constantly turning off and on to maintain the temp. The stone tiles are almost 1/2" thick and would hold their heat a lot longer. But installing a marble / granite tile print bed is another blog post.
So now i had these glass sheets and i had to cut them to size. So here's the quick lesson on how to cut glass or a mirror. This is from another post that i did earlier about cutting glass.
Some of below is from my blog post about How to Cut Glass
http://davewirth.blogspot.com/2017/03/how-to-cut-glass.html
Here's the quick lesson on how to cut glass or a mirror. I needed to cut some glass for my 3D printer.
First, about what you are cutting. I used a mirror which was about 1/8" thick, which is pretty standard.
I bought a 6 pack of 12"x12" mirrored glass at Lowe's for $10.
Or you could buy individual pieces of glass. For example a 10"x12" piece of glass is under $3.
Second, you need the right tools. The main tool is obviously the glass cutter.
I have a fairly cheap one, which you can buy on Amazon for $5.
The way that the glass cutter works is that there's a tiny wheel on the front which is made of carbide steel, which is able to "score" a line into the glass.
Other tools are safety glasses, gloves, straight edge, a metal file for rounding the edges, and a work surface with a towel.
For some small cuts you may need a wrench to snap off the glass piece.
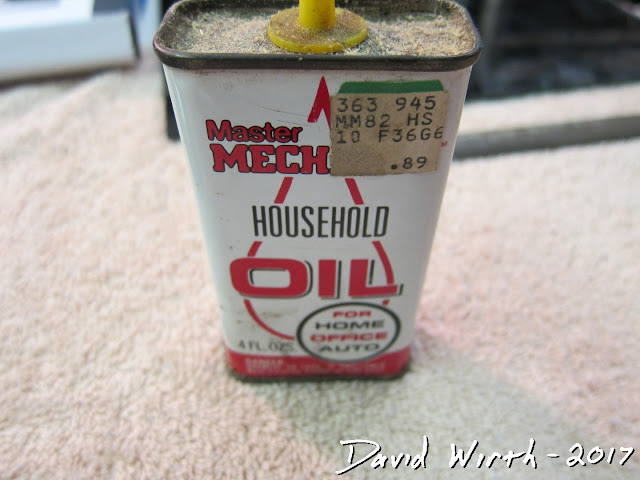
Another thing you need is some type of oil, i used 3-in-1 oil. Because the cutter needs lubrication in order to sline smoothly.
Once you know where you want to cut the glass, apply a thin line of oil over the line, hold the straight edge tightly to the glass, then in one smooth movement firmly score a line in the glass. It should take a lot of force pushing down and you should hear a crackling sound.
Make sure the score line goes from one end to the other, if there's a gap you can go back and score the ends.
Then use the ball end of the cutter to gently tap on the glass near the score line. This will help promote the score line cracks all the way through the glass.
The actual aluminum build plate size is 6 1/4" x 5 1/8", but there are adjustment screws in the corners that need to be accessed from above. Some printers have thumb screws that can be adjusted from below, which are better.
So i had a few options. First i could have cut the glass the exact size of the print bed, then when i needed to level the print bed i would have to move the glass back and forth to get access to the screws. Second i could cut the glass smaller so that i would always be able to adjust the screws, 5 5/8" x 4 3/8".
For a while this worked fine, but it became a paint to adjust the bed level, since the allen screws were covered by the glass.
Originally i decided to go with the full size glass, but later i learned that i could actually cut the corners off.
This is great because i get the full bed size, but also can access the leveling screws.
Next is when i learned more about how the printer actually works. The Monoprice Select Mini actually has little switches for the X, Y, and Z axis that tells it when it's come to the end.
Other more advanced printers have a little feeler arm near the nozzle which detects the height of the bed and automatically stops.
But with the MP mini you have to add a spacer. The printer doesn't know you added a piece of glass and without a spacer it would continue to try to go down to where the aluminum plate is and probably crack the glass.
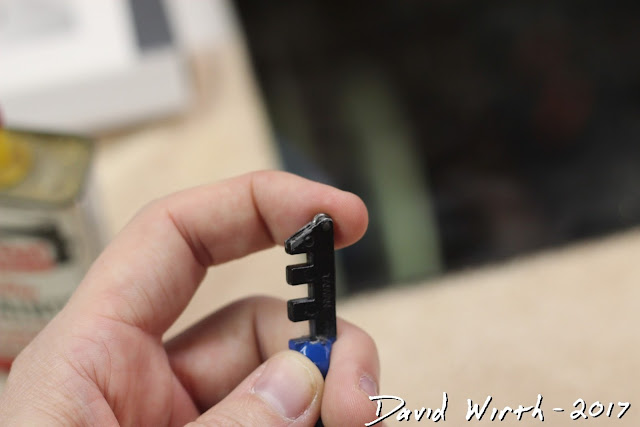
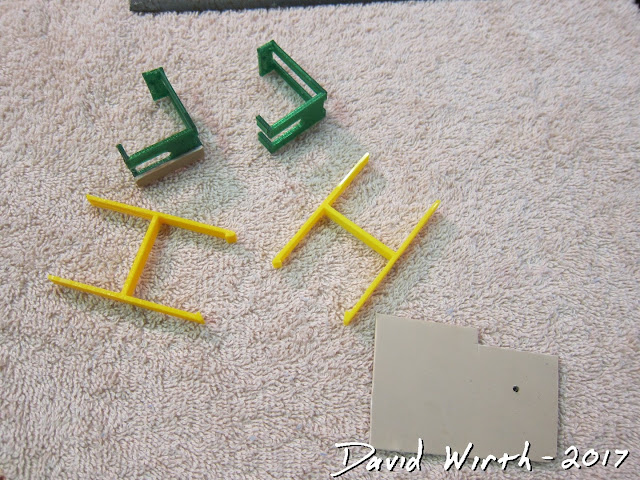
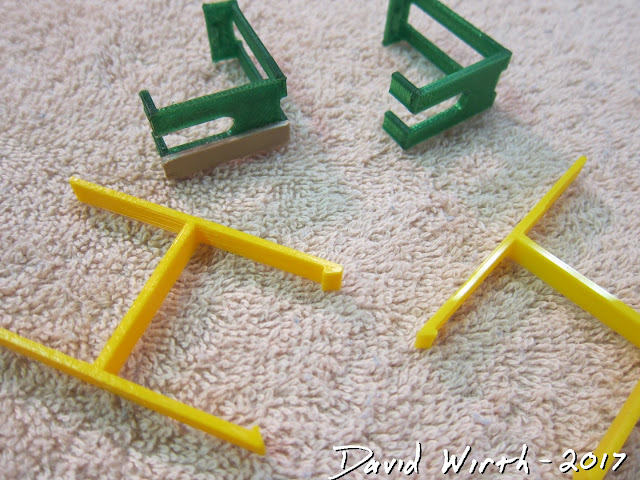
Luckily, i again learned from people who had done this before me. There are some spacers that people have drawn in 3D, that you can snap onto your arm. Here's the first spacer i used.
Here it is on the printer.
One shortcoming of this spacer is that you have to remove the back plate of the printer to install it. That means that you have to take the bottom off and remove 6 screws. It can be a bit of a pain if you are constantly doing adjusting.
There's another spacer that someone drew that has little handles and you can snap it into place without removing the back plate.
One thing to note is that the thickness of the spacer should equal the thickness of the glass. I didn't really think about this and my glass was slightly thicker than the spacer and that meant that i had to crank down the adjuster screws all the way to the bottom.
So instead of redrawing the spacer, i just super-glued a piece of plastic to the bottom, it worked great.
Another view of it on the bar/arm.
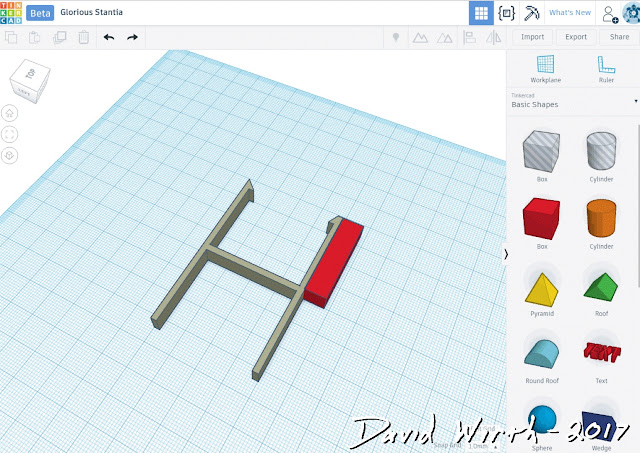
Later i used TinkerCad and modified the spacers thickness for glass and stone tile.
Another view of the large spacer.
It was actually pretty easy to go in and add a square piece on the edge to match the thickness.
Another thing you have to consider is how you are going to attach / hold the glass to the aluminum bed. There are 3D printed clips you can use, but i didn't have a lot of luck with them. Also you have to use a smaller piece of glass.
Lots of people used simple metal binder clips. The trick with those is that you need to use the smallest ones you can find. The big ones work ok, but get in the way and hit the X-axis arm. So you have to remove the metal clips from the black part every time. Once i found the small ones it's been a lot easier.
Smallest binder clip that fit.
Another view of the sizes
After you add the glass and add the spacer, you will need to re-level the print bed. Then you should be all ready to print on glass.
Some people just print directly on the glass, with the heat set to 50 or 60 deg C. That does work and produces an amazingly smooth shiny surface.
However it doesn't always stick throughout the entire print. I've found some PLA where printing directly on glass is fine, but other PLA and especially PETG doesn't stick.
So for the majority of my prints i use a glue stick.
I use just a regular Elmers white glue stick. After the bed is heated i lightly wipe it on, the heat makes it slide like melted butter.
I can usually print this way about 5 times in a row before i need to remove the glass, run it under water in the sink and wipe off the glue residue.
Now i know that some people use Aquanet hairspray with great results. I've tried this a few times but didn't get good enough adhesion. They say to spray the hairspray on the glass, let it dry, and repeat with 3 or more coats. It does give a slightly tacky surface, but in my experience the parts come loose while printing. So i stick to just glass or most of the time, glue stick.
The convenience of printing on glass alone is reason for me to use it, with the amazingly shiny surface being a perk. I would hate to have to go back to using masking tape.
And once i get around to cutting the marble and granite i will make another video and write a blog post about it.
Oh....and (knock on wood) i haven't had any of my glass break from the temperature. But if it does i'm only out $0.42 versus $20.
Glass Print Bed - For Under $1 - 3D Printer - MP Select Mini
https://youtu.be/vy30E6wJIz4The most common build plates are aluminum and glass. The advantage of aluminum is that it's cheap, durable, and the heated bed cartridge can be attached directly to the underside.
To print on aluminum you need to have some type of covering like masking tape.
The advantages of a glass print bed is that it is perfectly flat (will not warp or bend), easy to clean, does not need any type of protecting tape, produces a super smooth shiny surface when printed on.
I have the Monoprice Select Mini and it comes with an aluminum build plate.
Which is fine, i printed several parts onto blue masking tape. It worked well and had fairly good adhesion. But i decided to install a glass bed, for a few different reasons. First i got sick of adding and removing the blue painters tape. Second i liked the idea of printing directly onto glass and being able to clean it up by running it under water in the sink. And third i was intrigued by the shiny surface when printed on.
In the very early days of 3D printing, people tried all sorts of different build plates, but glass and aluminum kind of became the standard.
So what type of glass do you use. When you read about 3D printer glass beds and hear what people write about in forums, the name Borosilicate Glass comes up. Borosilicate glass is what's used to make test tubes and beakers for chemistry class (Pyrex). The advantage of this glass is that it can withstand very high temperatures. And since it is a 'Heated Bed', borosilicate glass is an obvious choice.
So i went on Amazon and looked for 3D printer glass beds that i could use. It turns out that everyone is charging a minimum of $20 for a sheet of glass.
Another option of boro glass.
I wasn't really happy with the idea of spending $20 for a sheet of glass. So i continued to read about other people's experience and learned all about what people have used in the past.
Here's a list of some of the different materials people have tried, other than just buying the borosilicate 3D printer glass:
- Mirror glass
- Window glass
- Tempered glass
- Frosted glass
- Heat treated glass
- Floor tile
- Marble tile
- Granite tile
- Aluminum sheet (may oxidize)
- 9h Glass laminate sheet protector for tablet (gorilla glass)
Here's another story i saw where someone said the 3D printed part stuck so well to the borosilicate glass that it took a chunk out when they tried to remove it.
When i heard someone say that they just went to the dollar store, bought a picture frame, and was successfully using that glass for their print bed, i knew that's what i was going to do. Before spending $20 i was going to try the cheapest glass i could find. The fear is that when the bed heats up, the ordinary glass might crack, but for $1 it was worth a shot.
I actually ended up going to Lowe's and looked in their glass and lexan cutting section. It turned out that i could buy a piece of 10"x12" glass for $3.
But then i went to the back of the store and saw that they sold a 6 pack of 12"x12" mirrored glass for $10.
I figured that things weren't going to go perfectly and i should probably have some extras. Whether i broke a few pieces while trying to cut it, or whether some cracked during printing. So i bought the box. And it turns out that i only needed the glass to be roughly 6"x6", so i could get 4 pieces out of each sheet, which means i could get 24 sheets from the box. So i was getting 24 glass print beds for $10 ($0.42 per sheet) versus 1 print bed for $20, which is 48 times the price.
Also while i was at Lowe's i saw a piece of 12"x12" marble tile on the clearance rack for $2.
I decided to buy that too just for experimenting. And i also remembered that i had some old 12"x12" granite tiles in the garage from a project we did on our house. Both the marble and granite tiles had a super smooth shiny surface.
Leftover granite tile in the garage.
This will be for an experiment later... if i ever get around to it.
One big advantage of the stone tiles would be their ability to retain the high temps. With aluminum and glass the bed heater is constantly turning off and on to maintain the temp. The stone tiles are almost 1/2" thick and would hold their heat a lot longer. But installing a marble / granite tile print bed is another blog post.
So now i had these glass sheets and i had to cut them to size. So here's the quick lesson on how to cut glass or a mirror. This is from another post that i did earlier about cutting glass.
Some of below is from my blog post about How to Cut Glass
http://davewirth.blogspot.com/2017/03/how-to-cut-glass.html
How to Cut Mirror Glass - QUICK
https://youtu.be/uniR7W9U5gMHere's the quick lesson on how to cut glass or a mirror. I needed to cut some glass for my 3D printer.
First, about what you are cutting. I used a mirror which was about 1/8" thick, which is pretty standard.
I bought a 6 pack of 12"x12" mirrored glass at Lowe's for $10.
Or you could buy individual pieces of glass. For example a 10"x12" piece of glass is under $3.
I have a fairly cheap one, which you can buy on Amazon for $5.
The way that the glass cutter works is that there's a tiny wheel on the front which is made of carbide steel, which is able to "score" a line into the glass.
Other tools are safety glasses, gloves, straight edge, a metal file for rounding the edges, and a work surface with a towel.
For some small cuts you may need a wrench to snap off the glass piece.
Another thing you need is some type of oil, i used 3-in-1 oil. Because the cutter needs lubrication in order to sline smoothly.
Once you know where you want to cut the glass, apply a thin line of oil over the line, hold the straight edge tightly to the glass, then in one smooth movement firmly score a line in the glass. It should take a lot of force pushing down and you should hear a crackling sound.
Make sure the score line goes from one end to the other, if there's a gap you can go back and score the ends.
Then use the ball end of the cutter to gently tap on the glass near the score line. This will help promote the score line cracks all the way through the glass.
Next it's time to snap the glass on that score line. Wearing your gloves, hold the score line on the edge of the table. Then slowly apply pressure on the overhanging edge until it snaps (hopefully on the scored line).
The actual aluminum build plate size is 6 1/4" x 5 1/8", but there are adjustment screws in the corners that need to be accessed from above. Some printers have thumb screws that can be adjusted from below, which are better.
So i had a few options. First i could have cut the glass the exact size of the print bed, then when i needed to level the print bed i would have to move the glass back and forth to get access to the screws. Second i could cut the glass smaller so that i would always be able to adjust the screws, 5 5/8" x 4 3/8".
For a while this worked fine, but it became a paint to adjust the bed level, since the allen screws were covered by the glass.
This is great because i get the full bed size, but also can access the leveling screws.
Next is when i learned more about how the printer actually works. The Monoprice Select Mini actually has little switches for the X, Y, and Z axis that tells it when it's come to the end.
Other more advanced printers have a little feeler arm near the nozzle which detects the height of the bed and automatically stops.
But with the MP mini you have to add a spacer. The printer doesn't know you added a piece of glass and without a spacer it would continue to try to go down to where the aluminum plate is and probably crack the glass.
Luckily, i again learned from people who had done this before me. There are some spacers that people have drawn in 3D, that you can snap onto your arm. Here's the first spacer i used.
Here it is on the printer.
There's another spacer that someone drew that has little handles and you can snap it into place without removing the back plate.
One thing to note is that the thickness of the spacer should equal the thickness of the glass. I didn't really think about this and my glass was slightly thicker than the spacer and that meant that i had to crank down the adjuster screws all the way to the bottom.
So instead of redrawing the spacer, i just super-glued a piece of plastic to the bottom, it worked great.
Another view of it on the bar/arm.
Later i used TinkerCad and modified the spacers thickness for glass and stone tile.
Another view of the large spacer.
It was actually pretty easy to go in and add a square piece on the edge to match the thickness.
Another thing you have to consider is how you are going to attach / hold the glass to the aluminum bed. There are 3D printed clips you can use, but i didn't have a lot of luck with them. Also you have to use a smaller piece of glass.
Lots of people used simple metal binder clips. The trick with those is that you need to use the smallest ones you can find. The big ones work ok, but get in the way and hit the X-axis arm. So you have to remove the metal clips from the black part every time. Once i found the small ones it's been a lot easier.
Smallest binder clip that fit.
Another view of the sizes
After you add the glass and add the spacer, you will need to re-level the print bed. Then you should be all ready to print on glass.
Some people just print directly on the glass, with the heat set to 50 or 60 deg C. That does work and produces an amazingly smooth shiny surface.
However it doesn't always stick throughout the entire print. I've found some PLA where printing directly on glass is fine, but other PLA and especially PETG doesn't stick.
So for the majority of my prints i use a glue stick.
I use just a regular Elmers white glue stick. After the bed is heated i lightly wipe it on, the heat makes it slide like melted butter.
I can usually print this way about 5 times in a row before i need to remove the glass, run it under water in the sink and wipe off the glue residue.
Now i know that some people use Aquanet hairspray with great results. I've tried this a few times but didn't get good enough adhesion. They say to spray the hairspray on the glass, let it dry, and repeat with 3 or more coats. It does give a slightly tacky surface, but in my experience the parts come loose while printing. So i stick to just glass or most of the time, glue stick.
The convenience of printing on glass alone is reason for me to use it, with the amazingly shiny surface being a perk. I would hate to have to go back to using masking tape.
Another view of the print bed.
And once i get around to cutting the marble and granite i will make another video and write a blog post about it.
Oh....and (knock on wood) i haven't had any of my glass break from the temperature. But if it does i'm only out $0.42 versus $20.













No comments:
Post a Comment