8/09/2017

3D Printing Filament Explained - PLA, ABS, PETG, Nylon, TPE, TPU, PVA

One of the first questions people ask after getting a 3D printer is "What material do i print with?" There are lots of different filaments available and even more companies to buy it from.
3d printer filament, type, different, cheap, buy


Filament Explained - 3D Printing Materials

https://www.youtube.com/watch?v=k8Kru6mTZ-E

If you are just starting with 3D printing it can be daunting when you hear about all the different materials to print with. Everything from PLA, ABS, PET, TPE, Nylon, etc. It's important to understand what all of these materials are, how they print, settings required, and what types of prints you can make.
different types of 3d printing filament, what to print with
I'm going to try to explain good filaments for beginners, what are more advanced filaments, and some unusual filaments for printing specific things like gears, cell phone cases, support structure, etc. I will also explain the difficulties of printing with things like nylon, including temperatures you need to be able to print with just to consider buying nylon filament.
best filament to 3d print with, try, new

Results from all the filament i tested in past reviews.
results of filament review, 3d printer filament

Another view.
results of 3d printer filament, types, different


Most printers will say in their specifications that their printable materials are PLA, ABS, ... If you are just starting out you will think "Great, i can print TPU...What the heck is TPU?" While doing my filament reviews i received samples from several different filament companies. One of the best info sheets that came with filament was from eSun. They included this with their roll:
esun table of filament, description, temp, settings

Filament, description, and uses.
3d printer filament, uses, cases, flexible, cost


More filament stacked up.
cheap 3d filament spool
This is great for quickly explaining the baseline settings for filament and an example of what each filament can print. As far as popularity, you can see that PLA and ABS make up the majority, but it is my opinion that PETG will only continue to grow.
most popular type of 3d printing filament

So going into more detail on each filament type:

PLA

This is by far the most popular filament people print with. It is easy to print with, forgiving, versatile and works under a wide range of settings. PLA is very rigid, it does not bend before it breaks, it just shatters. There are also PLA's with additives in it like carbon fiber, wood, steel. Although with some of those additives you need a special steel nozzle because it can wear out. Exteruder Temp = 190 - 220deg C Heated Bed Temp = none or 50deg C
PLA filament

Close up view.
close up view of pla filament

Shiny PLA filament
shiny pla plastic

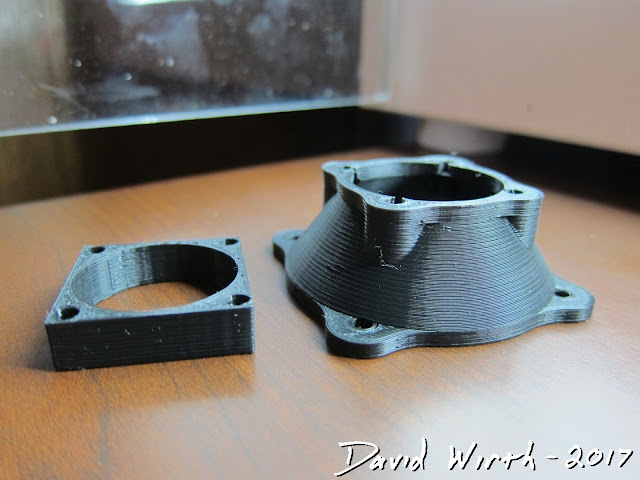
Great for clean crisp parts like these structural 3D printer parts for a fan shroud.
how to 3d print with pla

Strong yet brittle.
printed pla part example


ABS

This is the second most popular filament that people use. Unlike PLA, ABS is more pliable. It will bend and deform before breaking. However there are some reports that printing with ABS produces hazardous gasses, because of the melting plastic. So it is recommended to use an enclosure and vent. Extruder Temp = 235 Heated Bed Temp = 90
spool roll abs plastic cheap

The most popular toy in history is made of ABS. It's injection molded but still the same material, which goes to show the strength of ABS plastic.
what are lego bricks made of , abs plastic


PET / PETG

This is quickly becoming more popular because of its combination of features between PLA and ABS. PETG is the same material as plastic bottles. It has a great look when you buy a Clear colored filament. It is ductile like ABS but easy to print with like PLA. It can be very stringy though and printing can be a bit trickier with settings like reduced speed and increased retraction. This comes in several proprietary names like E3D's Edge filament, FormFutura's HDglass filament, ColorFabb's nGen filament... Extruder Temp = 230-250 Heated Bed Temp = 65-85
e3d edge filament, petg, copolyester, filament

Parts like this come out very clean yet incredibly strong.
best of pla and abs is petg

You can get great colors and shinyness with PETG, perfect for vases and decorative prints.
super shiny petg filament, vase

Again, very shiny and semi-transparent parts.
best filament to 3d print with


Nylon / Nylon Bridge

Nylon is an extremely strong filament, probably twice as strong as any other filament in this list. However it is difficult to print with and not every printer is capable of printing nylon. That is because of the extremely high temps required. The extruder temperature needs to be up somewhere around 300deg C and most 3D printers max out at 250deg C. Another issue with nylon is that if it is left out it will absorb water and start popping while printing. Therefore you need to dry this filament out in the oven and keep it in a dry airtight place. Beyond that you will need to print at slow speeds, like 30mm/s, and only have the cooling fan on while trying to bridge. Extruder Temp = 250-300 Heated Bed Temp = 70
how to 3d print with nylon

Perfect for parts that require high strength or will experience heavy wear. Nylon is almost double the strength of other material in this list.
3d print nylon gears


TPE / TPU

This filament is specifically for bendable rubber-like parts. For example cell phone cases. It can be difficult to print with because it needs a large retraction to control the oozing. You will have to really experiment with the settings to get it to print without having it curl up and cover the nozzle. Extruder Temp = 220 Heated Bed Temp = 40

The most popular of this filament is NinjaFlex.
flexible filament, ninjaflex

It can be tricky to print with, requiring modifications to make a solid connection from your extruder to the hotend.
how to 3d print flexible filament

But perfect filament for printing things like cell phone cases, which need to bend and flex and absorb impact.
how to 3d print a cell phone case, flexible

PVA

PVA is specifically used for printing support for parts. It is used with printers that have dual extruders. The reason it is only used for support is because PVA dissolves in water. That means that you can print complex/elaborate parts like honeycomb cubes, which would be impossible to print without support. And if you used just 1 filament it would also be impossible to get in and remove the filament once it is printed. Extruder Temp = 180 Heated Bed Temp = 45
pva filament, dissolving filament

Here is an example where PVA is necessary.  This model requires support, but it would take forever to remove the support once it's printed.
how to print with dual extruders, dissolving

Several hours into it's water bath and the PVA is dissolving away.
dissolve 3d printing filament

Finished part with all support gone.
how to 3d print the impossible part

Again, another print that would be impossible without support, but removing the support would destroy the print
3d print dissolving filament


Hips

This is similar to PVA in that it is used for support, but this dissolves in a limestone solvent. Extruder Temp = 220 Heated Bed Temp = 55


Felty / FeltLay

This filament is used when someone wants to print porous objects like filters and sponges. It is a 2 part material where one part is later dissolved. Extruder Temp = 230 Heated Bed Temp = 40
3d print felty, flexible foam


Foam / LayFomm

Again, similar to Felty, this is for printing porous objects, but this creates more of a rubbery sponge like object. Extruder Temp = 220 Heated Bed Temp = 50
how to 3d print foam, layfomm filament

Beyond all of these there are even more filaments that people print with such as resin, XT Copolyester, TPC, FPE, Jelly ...

Cheese-Wiz

3d print cheese wiz

Cheese and crackers in under 1 hour.
funny cheese wiz 3d print

Concrete

Pour an entire house in a day.
3d print a house, concrete
So you can see that there's lots of different filaments for all sorts of uses, from bendable cell phone cases to very strong gear parts. Most people won't really care about the odd-ball stuff, but might be interested in trying.

8/07/2017

3D Print - SETTINGS - Cura, Gcode, Slicer

Previously i wrote about selecting a good cheap beginner printer, tips and tricks i learned, and programs and tools i use. This time i wanted to go more into depth about settings.


3D Printer SETTINGS - Know How to Setup Cura, Simplify3D

https://www.youtube.com/watch?v=QInDraFNqyM

Whenever you are reading a message board where people are discussing 3D printing, "what are your settings?" will most assuredly come up...multiple times. And for good reason. Learning and understanding settings is the most important factor in getting good prints. Now just because you have the perfect settings for your printer and for that particular filament, doesn't mean you are going to get a perfect print. There are some differences between the $1,500 printers and the $200 printers. But the goal is to get the best prints you can with the printer you have. Kind of like Chase Jarvis' quote, when asked what is the best camera. "The best camera, is the one that you have with you."

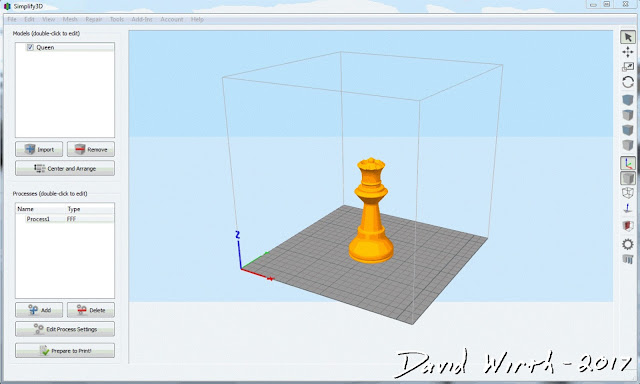
In a previous post/video i wrote about the concept of going from a 3D file, bringing that into your editing/slicer program, giving it some setting information, then sending it to print. I won't go over that again, but i will bring up some of the most popular 3D printing programs:
thingaverse, thingiverse, upload, download, .stl, obj, file type, how to, search

Now the MonoPrice Select Mini comes with a MicroSD card and on that card comes a version of Cura 15.04.06. You can also download past versions of Cura or the most current at the time i write this, which is Version 2.3.

cura settings, version 15, version 2.3, cura slicer
But i think that Cura v15.04.06 is a great program to start off with. It's not overwhelming with every imaginable setting possible, it has just 2 pages of settings and lets you adjust the most important ones. Once you get familiar with all the settings on this version of Cura, you can then move onto the other programs and learn even more. Usually that comes about when you get issues with something you print, go online and read that you need to change some number in some obscure setting that isn't on the old Cura. For example i had a problem with a particular filament, i was getting blobs at the end of each shell row. I fixed it by using the new Cura 2.3 settings and select Comb and Pre-Retract the filament a certain distance before ending. Those two settings aren't very common and not possible on the old Cura.

Another option that i will quickly mention is Simplify3D. This program is $150, but does give many options and settings for various things. I find myself using it more and more, although the new Cura 2.3 also has these similar settings. So all things being equal i would suggest saving your money, but i do recommend trying different programs and use the one that you like best.
simplify3d, slicer, slic3r, cura, simplify3d cost

Anyway back to Cura v15.04.06.

Let me start by saying, it's important to save your profiles as you go along. Right away save these settings, call them something like "Baseline PLA (date).ini" This way, as you go along you will constantly have different versions of settings. So if you change something and it totally screws up, or prints really bad, you can go back and load up a previous setting that you know works. For example once i went in and checked a box that i thought would print the outer shell more smoothly. It was suppose to gradually increase the Z-axis as it went along. But what it also did was skip printing the infill and support. I couldn't figure out what happened and had to go back and check everything i had done to figure it out. It would have been easier to just reload a profile that i knew worked. For a detailed explanation of every Cura setting and what they all do you can watch the video at the top.
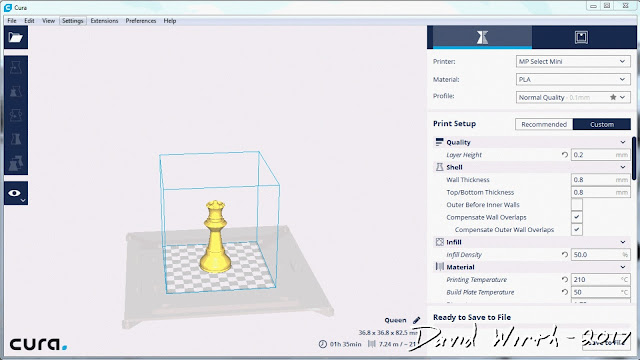
Here's a quick summary of each one

Cura BASIC - Tab 1

cura advanced settings, basic settings, how to import, profile

Quality (slow for a detailed part, fast for lower quality) Layer Height = 0.2 0.1 for fine Shell Thickness = 1.2 factor of nozzle Retraction - always check Fill (how strong of a part you need it to be) Bottom/Top Thickness = 1.2 same as shell Fill Density = 20% for toys, 50 for heavy duty stuff, 70 for stuff that needs to be real strong Speed and Temperature (very important for quality of prints) Print Speed = 20 for super fine prints, 40 for most stuff, 60 for real fast prints (this will be defined more in detail later in the menu) Printing Temperature = look on the side of your spool. PLA = 190-210. PETG = 230-250. Support (bed adhesion and overhangs) Support Type - Everything (it prints supports for all overhangs) I use Line type of support. Platform Adhesion Type - Brim (usually 5 rows is fine, gives me a chance to make sure the filament is flowing well and helps for bed adhesion. Filament Diameter = 1.75 you never have to change this Flow = 100 never change this either (although on page 2 i increase the flow for the 1st layer)

Cura ADVANCED - Tab 2


cura advanced settings, how to profile, settings, cura

Retraction Speed = 40 Distance = 4 Quality Initial Layer Thickness = 0 (0 = no change) Initial Layer Line Width = 0 (0 = no change) Cut Off Object Bottom = 0 (don't cut off) Dual Extrusion Overlap = 0.15 (doesn't matter because i don't have dual extrusion)
Speed Travel Speed = 150 (speeds up print speed) Bottom Layer Speed = 20 (slower first layer helps for better adhesion) Infill Speed = 50 (don't care about quality of infill print, so faster than overall speed) Top/Bottom Speed = 0 (0 = no change, already saying bottom to be slower) Outer Shell Speed = 20 (slower on outer shell for better quality print) Inner Shell Speed = 30 (between overall speed and outer shell speed)
Cool Minimal Layer Time = 5 (this doesn't really matter, it prohibits going to the next layer too quickly) Enable Cooling Fan - always check and leave at 100%, or else i've had problems where the filament melts and gets stuck inside of the heat sync.

GCode

Here's what the GCode that is produced looks like. The top is all the settings you select (as well as mixed in the code), the bottom is the X, Y, and Z coordinates.

And here are those GCode files loaded up into the printer ready to print.

Again for a more in depth explanation of everything and typical settings, watch the video. And again, these are just the most basic settings, once you learn these, then you can get into the more advanced 3D printing design software and adjust things even more. But these basic settings have to be right before moving onto more complex stuff. Hopefully this helps you to understand things a little more and get better prints.