skip to main |
skip to sidebar
I finally got tired of my slow computer that i've been using for over 10 years. A year ago i moved it downstairs to act as my HTPC (Home Theater Personal Computer). I was able to because i built a new AMD quad-core computer for $200. I'm using that computer with my 32" 1080p LCD TV. I was using it as my but even just as a browser and movie player is was slow. So i bought new parts and reused the case. That way i would be able to use the internet and watch Blu-Ray HD movies on my 51" plasma TV without any skipping.
Here's what the computer and case looked like before i started.
 The case was super dirty, all of the fans had a thick coating of hard dust.
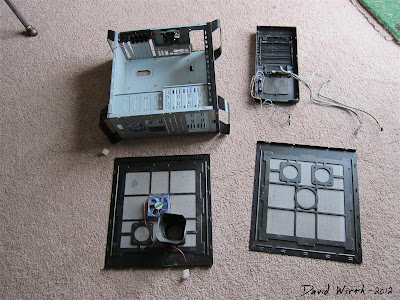
 The case cleaned and emptied.
 So like before, here are the parts i bought.
 Even though i am spending the same amount, $200, as i did a year ago, all the parts i bought are better than before. My video card is a Radeon HD 6670 which cost $60. Last year i spent the same amount and got a 6470. I got 8Gb of ram versus 4Gb. But the biggest difference is the CPU. The new AMD FX 4100. And as always with Microcenter, when you buy the CPU, the motherboard is only $10.
 The HIS - Radeon HD 6670 video card.
 Corsair SMS 3 RAM - 8Gb
  Motherboard installed.
 I originally didn't buy a new power supply, i went with my old 350 watt PSU.
 Here is everything installed and connected.
 It started up, i installed Windows 7 using a USB Flash Memory Stick. But during the first 2 weeks of running it crashed 4 times. I realized that the old 350w power supply was probably not able to handle the new computer. So i bought a Corsair 420w power supply for $20 after rebate. It runs perfect now.
EDIT:
Parts, Prices and Stores
- CPU -- AMD FX 4100 - $89 (Microcenter)
- Motherboard -- Asus M5A 78L-M LX Plus - $10 (Microcenter - normally $50, but only $10 with the purchase of CPU)
- Video Card -- HIS Radeon 6670 - $60 (Microcenter - after $15 mail in rebate)
- RAM -- Corsair XMS-3 8Gb - $30 (Microcenter - after $20 mail in rebate)
- Power Supply -- Corsair CX430 - $20 (Newegg - after $20 mail in rebate)
- Case -- Reused old case - "Free"
This page was added because it it s a requirement of Google when using Google AdSense.
- David Wirth
-------------------------------------------------------------------------------------------------------------------------------
Privacy Policy for davewirth.blogspot.com
The privacy of our visitors to davewirth.blogspot.com is important to us.
At davewirth.blogspot.com, we recognize that privacy of your personal information is important. Here is information on what types of personal information we receive and collect when you use and visit davewirth.blogspot.com, and how we safeguard your information. We never sell your personal information to third parties.
Log Files
As with most other websites, we collect and use the data contained in log files. The information in the log files include your IP (internet protocol) address, your ISP (internet service provider, such as AOL or Shaw Cable), the browser you used to visit our site (such as Internet Explorer or Firefox), the time you visited our site and which pages you visited throughout our site.
Cookies and Web Beacons
We do use cookies to store information, such as your personal preferences when you visit our site. This could include only showing you a popup once in your visit, or the ability to login to some of our features, such as forums.
We also use third party advertisements on davewirth.blogspot.com to support our site. Some of these advertisers may use technology such as cookies and web beacons when they advertise on our site, which will also send these advertisers (such as Google through the Google AdSense program) information including your IP address, your ISP , the browser you used to visit our site, and in some cases, whether you have Flash installed. This is generally used for geotargeting purposes (showing New York real estate ads to someone in New York, for example) or showing certain ads based on specific sites visited (such as showing cooking ads to someone who frequents cooking sites).
You can chose to disable or selectively turn off our cookies or third-party cookies in your browser settings, or by managing preferences in programs such as Norton Internet Security. However, this can affect how you are able to interact with our site as well as other websites. This could include the inability to login to services or programs, such as logging into forums or accounts.
Brackets for the 2012 NCAA Men's College Basketball Tournament in 6 different Printable Formats - JPG, word, PDF, TIFF, Google Doc
Printable Bracket:

 I hope that Michigan State goes all the way, but it looks like they are in the toughest region.
While reading about making the ND filter i saw instructions on making an Infrared filter for your camera. The ND filter used a piece of welding glass to "dim down" the amount of light that enters the camera. With a IR filter you need something that only allows infrared light to enter the camera. I had an old camera that i never use because the lens is kind of scratched, so it was perfect to try this out with.
The infrared wavelength is just longer than is visible to the human eye. In fact visible light is only a small part of the light spectrum.
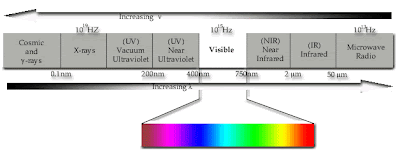 Far infrared is used in thermal imaging cameras. Heat given off by objects is in the far infrared spectrum of light.
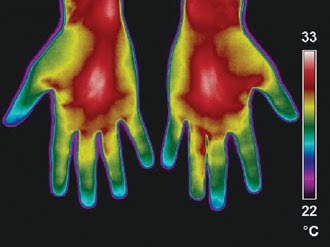 The pictures i would be taking would not show this kind of thermal imaging, just the light from the Near Infrared.
Simply put, i wanted to remove the piece of glass that blocks infrared light, then add exposed film which ONLY allows infrared light into the camera.
First, the hard part. Camera's have a tiny piece of glass between the lens and the sensor which blocks infrared light from passing through. I wasn't sure i would be able to remove it but i did. It's the broken pieces of red tinted glass at the bottom right. And even more surprising is that i was able to put the camera back together the first time and it still worked.

Now that infrared light can pass to the camera's sensor i needed a way to block the visible light. Online there was a lot of different ways that people said this could be done but the cheapest and easiest way looked to use a piece of film negative and an old floppy disc.
 And i tried part of an old floppy disc.
 Here are the pieces from the exposed and unexposed processed film.
 I was planning on mounting the film on a PVC filter like i had done before. In hindsight that probably would have been a good idea. So i started to making a fitting out of PVC like before. But then i saw that the best way to do it was to cut the film and glue it in place INSIDE of the camera, right in front of the sensor. So i ended up not using this.
 But before i did that i needed to know what is the best material to use. I decided to experiment with all of the ways people suggested to block the visible light. Here were the 3 pieces that i would be testing.
 The material and the results from the test: (click images to enlarge)
1. Film negative that had been exposed to light
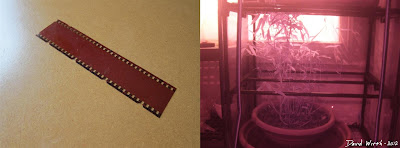 2. Film negative that had not been exposed to light
 3. Floppy disc
The floppy disc over the lens made the picture come out so dark that it wasn't usable. I could have left the shutter open for a much longer time, similar to the ND filter, but i decided just not to use it. So i moved on to layering two pieces of material together.
5. Two pieces of film negative that had been exposed to light
 6. 2 pieces of film negative that had not been exposed to light
 7. 1 piece of exposed and 1 piece of unexposed film negative
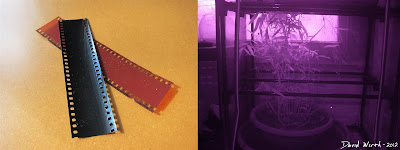
It turned out that the best result was the last one i tested, 1 piece of exposed and 1 piece of unexposed film negative.
I took a couple of pictures in the backyard and liked how they came out. This picture is the original, right out of the camera.
 This is after adjusting the colors in Photoshop.
 Now here's the bad part. When i finally decided what to use i took the camera apart again and glued in the 2 pieces over the sensor.


 Then when trying to put the camera back for the 4th time i damaged the small ribbon cable from the lens to the circuit board. You can kind of see the tiny hole in the orange cable.
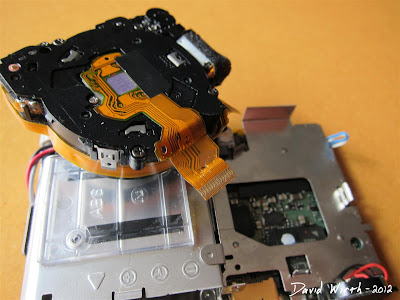 It's a bit of a bummer, not that i would have used this camera a lot but it would have been fun to experiment with.


