How to Change a Miter Saw Blade | Dewalt
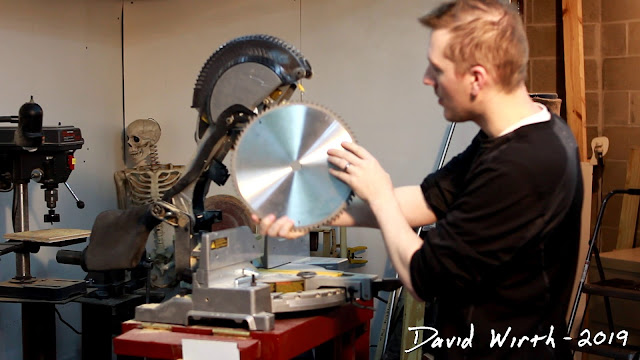
This is shown for the 12" DeWalt miter saw but is similar with any miter saw you have.
Conveniently the DeWalt saw provides the screw and socket needed to change the blade. It is on the left part of the saw behind the fence.
The first step is to unplug the saw.
Then you need to move the blade guard out of the way. This involves loosening this screw.
You need to be able to access this Reverse-Thread bolt that hold the blade in.
You can see that after the screw is loose, the guard can be moved up and have access to the bolt.
You also must push in the blade lock button so that the blade doesn't spin while you try to loosen it.
Here you can see that the loosened screw can hold the blade guard up and won't fall down.
Remember the bolt is reverse thread.
Just hold in the lock button and remove the bolt and collar.
When reinstalling the blade, remember that the teeth curl down over the front.
Video Transcript:
so the only tool you need to change the
blade on the DeWalt miter saw is
actually located right here with the
tool that's behind the rest it's a
two-in-one socket and star bit it's step
one is to unplug it make sure you unplug
the tool you don't want to be working on
it next time we hit it step two is to
lift the blade guard up and out of the
way it should lock you can get a little
pushing it'll lock in place like that
now you all you have to do is first undo
this one screw which will allow you to
push the blade guard out of the way and
loosen the blade so use the star bit end
so if you loosen that nut up about 1/2
inch this blade even if it falls it will
hit on that screw and it won't come down
next you lift the blade guard in the
middle there's the metal plate and you
push that up and out of the way and that
gives you access to the center nut here
you can see the nut that's loosened up
enough so it hits the blade guard and
stops it from falling down then you take
this metal plate push it up out of the
way and gives you access to that knife
so now with the blade guard out of the
way you push in on the other side
there's a black button right under the
trigger rotate the blade till it locks
in like that and now the blades locked
in and written right here on the side it
says loosen with an arrow going in the
other direction it's a reverse the red
nut so you have the blade lock use the
socket end and you rotate it reverse the
red bull the arbor and the blade comes
right off so here's the new blade I'm
putting on it's actually an 8
12-inch blade and when this is off I'm
going to sharpen it to get a little dull
so when putting on the new blade make
sure you have the rotation correctly it
says here rotation and actually the the
writing on this one is on the outside
and the teeth cut down the writing on
this new blade is actually on the other
side and you want the teeth cutting
downward and I'm the newly installed
blade make sure the teeth are pointing
down because that's the rotation of the
cut put the armor back on and then tighten
the nut remember it's the opposite
direction you're actually loosening it
when you get it snug DUP push in the
black button again to lock the blade and
you might notice when you push in the
button the blade actually rotates a
little but the arbor is locked you're
not actually locking the blade you're
lacking this Arbor and then it is
loosened to tighten now you can lower
the metal blade guard tighten it up and
you're all set ready to cut


