Filastruder - spool.Works E3D Edge - Filament Review
If you are looking to take the next step in your 3D printing then Filastruder's spool.Works Edge 3D filament might be perfect for you.
For more info you can also watch the video i created where i go into more depth about the filament and clips of it being printed:
Filastruder - spool.Works E3D Edge - 3D Filament Review
https://youtu.be/MIxlstaG9e8
Filastruder send me a roll of their spool.Works Edge 3D for review. My goal was to show people specifics about the filament, how it will print, tips for bed adhesion, and the final result of what they can expect.
Filastruder is a company that offers tons of different filaments of all different types. You can also buy loads of spare parts for your printers there, stuff like hotends and extruders. They have a great, easy to follow website:
I really like the look of the filament and clear roll.
It comes in dozens of really bright colors. I got their Limey Green color filament.
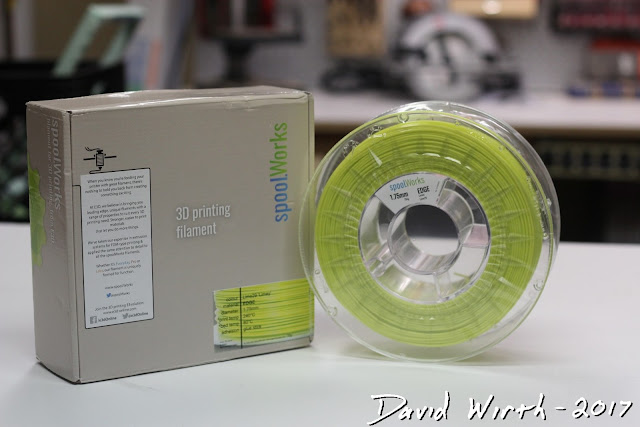
Here's what it looked like when it came in the mail.
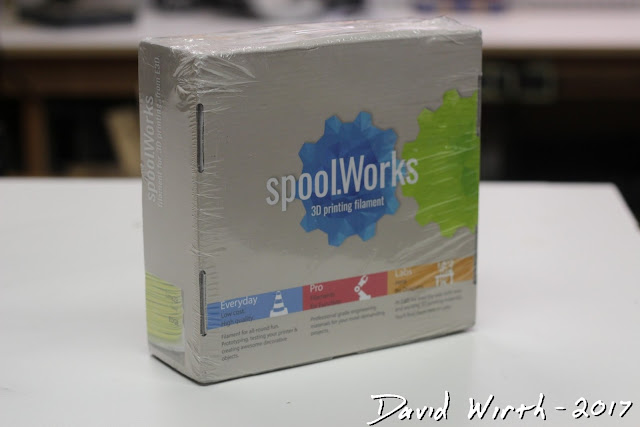
And here's what it looked like wrapped in an air-tight bag.
It comes on a clear spool which is great for seeing how much filament you have left to print with.
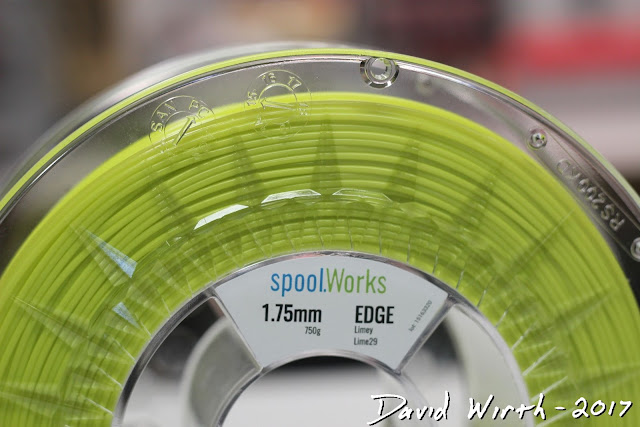
More about the color, type, and size.
The overall look and feel is more like a PETG with a glossy shine. It is very pliable and smooth, again much like a PETG filament. Also it is recommended that you print above 230 deg C, which is closer to a PETG, but does print under a wide range of settings which is similar to a PLA.
Their filament product page clearly shows what you are buying and settings for printing.
They will even give a link to the producer of the filaments like spool.works where you can get more pictures and information about the product.
1. Chess Piece - (OVERALL) This is a good overall part to show how the filament will print. It has smooth round lines, slight overhangs, and detailed ridges at the top. If this chess piece prints well in all areas then you can be confident that it will print everything well.
2. Bottle Opener - (STRENGTH) I wanted to print the bottle opener to test the filament's strength in a typical, everyday type of part. See how it reacts to bending, stress, strain, tension, and compression. Whether the printed part will be rigid or deform when a force is applied to it.
3. Caribener - (DUCTILITY) Similar to the bottle opener, the caribener needs to be strong in tension, but it also needs to bend. This may be a difficult test for filament like PLA which typically has a rigid characteristic.
4. Yoda - (DETAIL) Both of these parts will really require the printer to be able to print in great detail and need to handle tricky overhangs. The settings for these parts will have to be slowed down to print accurately.
The first thing i do after opening Cura is to import a saved profile for base PLA filament, then drag in the part to be printed. Obviously the 4 different test prints will need to have some settings different from each other. The Bottle Opener, which is focused on strength, will need a higher infill percentage but can be printed at a faster speed and higher Z axis. Where as the Chess Piece and Yoda will have little to no infill, but printed slowly for more accuracy.
There are no specific suggestions for printing with their PETG, but the following is a good baseline to start with:
Basic Settings
Advanced Settings
Expert Config
One thing to note is that the company suggests that the extruder temp be set to 240 degrees with an 80 degree heated bed. These numbers are rather high and reflect more of the PETG quality of the filament.
Once the gCode is saved and loaded into the printer we are ready to start printing.
I always pay great attention to the first layer, removing any stray filament, and remove any filament that may clump onto the nozzle.
Before the printing starts i will manually slow the speed of the print down by roughly half, to ensure that the filament sticks to the print bed. After the first couple of layers are secure i manually turn the speed up to full.
This filament flowed very well, not too runny like PETG can sometimes be.
And here are some close-ups:
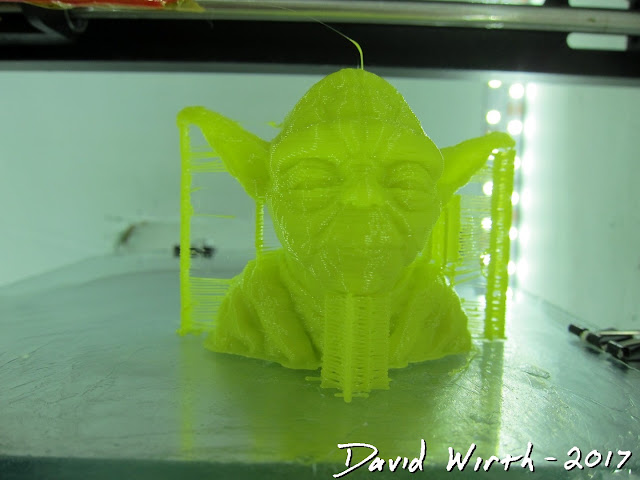
Here is the Yoda head, on the print bed, with supports. The adhesion to the print bed was excellent.
Another advantage of this filament was its high melting point, which allowed me to test and modify the cooling fan shroud. Other filaments would melt and deform when set this close to the extruder hot end, but the Edge 3D kept its form.
Filastruder said that the spool.Works Edge 3D is the perfect all-around filament, which combines the best features of PLA, ABS, and PETG... i tend to agree.
This is one of the most forgiving filaments that i've printed with. The way that the layers blend together creates a very smooth part that does not resemble your typical 3d print.
It was very forgiving in terms of settings, it printed well under a wide range. Adhesion to the glass bed was not an issue and again i had no issues with clogging.
Although the high 240 degree printing temperature was similar to a PETG filament, it did not act like a PETG. It did not droop or sag during printing.
The overall finished part is very professional looking with a very smooth surface.
The versatility of this filament shows up in the bottle opener. Some PLA's would crack or break when force is applied to this part, but this filament was quite strong.
Again, this filament performed well when testing the caribener. It had some bendability and tensile strength, but was not rigid like most PLA. This is where their new filament formula was noticeable.
Even at 0.3mm for the Z layer height, the Yoda head turned out good. There were no issues with the overhangs and the finished part looked great directly off the print bed.
I would use this filament for when i want to print a really nice 3D part. This is not the filament to use when you are printing a ton of prototype parts, or you aren't sure what you are printing. This filament is for your final display piece when you want everything to be perfect.
If you've ever printed with this Edge 3D filament let me know what you think. I predict that you've had the same results that i had. And if you haven't tried this filament you definitely should.
Visit Filastruder to buy a roll.
For more info you can also watch the video i created where i go into more depth about the filament and clips of it being printed:
Filastruder - spool.Works E3D Edge - 3D Filament Review
https://youtu.be/MIxlstaG9e8
Filastruder send me a roll of their spool.Works Edge 3D for review. My goal was to show people specifics about the filament, how it will print, tips for bed adhesion, and the final result of what they can expect.
Filastruder is a company that offers tons of different filaments of all different types. You can also buy loads of spare parts for your printers there, stuff like hotends and extruders. They have a great, easy to follow website:
FILAMENT
I really like the look of the filament and clear roll.
Edge 3D is offered as an all-around filament for every situation. Combining the best of PLA, ABS and PETG. With the ease of printing of PLA, durability of ABS, and strength and finish of PETG. It's perfect for someone who may not print a lot, but when they do print, they want the filament to look great and print easily.
You can see the super glossy finish.
It comes in dozens of really bright colors. I got their Limey Green color filament.
The first overall look of the filament is that it looks super bright and shiny.
Here's what it looked like when it came in the mail.
Here's the information on the box, showing print temp, bed temp, and recommended adhesion method.
A very professional look and feel to everything.
It comes on a clear spool which is great for seeing how much filament you have left to print with.
More about the color, type, and size.
The overall look and feel is more like a PETG with a glossy shine. It is very pliable and smooth, again much like a PETG filament. Also it is recommended that you print above 230 deg C, which is closer to a PETG, but does print under a wide range of settings which is similar to a PLA.
COMPANY
Like i mentioned earlier, Filastruder offers tons of filament from various companies. They sell just about every filament that exists.Their filament product page clearly shows what you are buying and settings for printing.
They will even give a link to the producer of the filaments like spool.works where you can get more pictures and information about the product.
TEST PARTS to be PRINTED
I decided to print 4 test parts, each of which will show a different characteristic of the filament:1. Chess Piece - (OVERALL) This is a good overall part to show how the filament will print. It has smooth round lines, slight overhangs, and detailed ridges at the top. If this chess piece prints well in all areas then you can be confident that it will print everything well.
2. Bottle Opener - (STRENGTH) I wanted to print the bottle opener to test the filament's strength in a typical, everyday type of part. See how it reacts to bending, stress, strain, tension, and compression. Whether the printed part will be rigid or deform when a force is applied to it.
3. Caribener - (DUCTILITY) Similar to the bottle opener, the caribener needs to be strong in tension, but it also needs to bend. This may be a difficult test for filament like PLA which typically has a rigid characteristic.
4. Yoda - (DETAIL) Both of these parts will really require the printer to be able to print in great detail and need to handle tricky overhangs. The settings for these parts will have to be slowed down to print accurately.
SETTINGS
Like i just said, their filament prints very well under a wide range of settings. So the settings i used can be thought of a just a general guideline of where to start. Also i used Cura v15.04.06 because of it's clear and simple settings layout. For filament that is more difficult to print with, a different slicer program may be needed, and more advanced settings may need to be adjusted.The first thing i do after opening Cura is to import a saved profile for base PLA filament, then drag in the part to be printed. Obviously the 4 different test prints will need to have some settings different from each other. The Bottle Opener, which is focused on strength, will need a higher infill percentage but can be printed at a faster speed and higher Z axis. Where as the Chess Piece and Yoda will have little to no infill, but printed slowly for more accuracy.
There are no specific suggestions for printing with their PETG, but the following is a good baseline to start with:
Basic Settings
Advanced Settings
Expert Config
One thing to note is that the company suggests that the extruder temp be set to 240 degrees with an 80 degree heated bed. These numbers are rather high and reflect more of the PETG quality of the filament.
Once the gCode is saved and loaded into the printer we are ready to start printing.
PRINTING
I like to print directly onto glass with a heated bed, and 90% of the time i use a glue stick to insure adhesion to the glass bed. You probably don't need to do this, it would work just fine printing onto masking tape, non-heated bed, or hairspray. I just like my process because i know it works on everything and the part won't lift half way through printing.I always pay great attention to the first layer, removing any stray filament, and remove any filament that may clump onto the nozzle.
Before the printing starts i will manually slow the speed of the print down by roughly half, to ensure that the filament sticks to the print bed. After the first couple of layers are secure i manually turn the speed up to full.
This filament flowed very well, not too runny like PETG can sometimes be.
PARTS
Here's the printed results:And here are some close-ups:
Here is the Yoda head, on the print bed, with supports. The adhesion to the print bed was excellent.
Another advantage of this filament was its high melting point, which allowed me to test and modify the cooling fan shroud. Other filaments would melt and deform when set this close to the extruder hot end, but the Edge 3D kept its form.
REVIEW
Filastruder said that the spool.Works Edge 3D is the perfect all-around filament, which combines the best features of PLA, ABS, and PETG... i tend to agree.
This is one of the most forgiving filaments that i've printed with. The way that the layers blend together creates a very smooth part that does not resemble your typical 3d print.
It was very forgiving in terms of settings, it printed well under a wide range. Adhesion to the glass bed was not an issue and again i had no issues with clogging.
Although the high 240 degree printing temperature was similar to a PETG filament, it did not act like a PETG. It did not droop or sag during printing.
The overall finished part is very professional looking with a very smooth surface.
The chess piece turned out very good. Even with insufficient cooling there was hardly any drooping on the overhang. And the curved and detailed sections came out very clean.
The versatility of this filament shows up in the bottle opener. Some PLA's would crack or break when force is applied to this part, but this filament was quite strong.
Again, this filament performed well when testing the caribener. It had some bendability and tensile strength, but was not rigid like most PLA. This is where their new filament formula was noticeable.
Even at 0.3mm for the Z layer height, the Yoda head turned out good. There were no issues with the overhangs and the finished part looked great directly off the print bed.
Final Summary
Admittedly at $38 it's not the cheapest filament you can buy. But if you want a filament that prints excellent parts with a perfect finish then the Edge 3D filament is a perfect choice. It is easy to print with so it would be perfect for a beginner. It also hides mistakes so it's great for a complex part. Also with a beginner printer like the Monoprice Select Mini it is a filament that prints with absolutely no problem.I would use this filament for when i want to print a really nice 3D part. This is not the filament to use when you are printing a ton of prototype parts, or you aren't sure what you are printing. This filament is for your final display piece when you want everything to be perfect.
If you've ever printed with this Edge 3D filament let me know what you think. I predict that you've had the same results that i had. And if you haven't tried this filament you definitely should.
Visit Filastruder to buy a roll.


