12/17/2011
12/12/2011
Signature to Photos
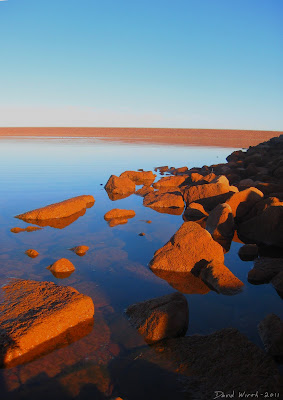
I decided that i should put my name and the date on some of the photos i upload to the blog. The way that i did it was to sign a piece of paper about fifty times. (not the actual way i sign my name for important documents though)
Then i scanned that paper and decided what signature i liked the best and isolated it. In Photoshop i fixed any out of place pixels and upped the contrast so there was only black and white.
Then i used the dreaded magic want tool, selected the background and deleted it. That way the signature would be transparent instead of always having a white background. Here is what it looked like when i was done. If the photo is dark where i want to put the signature then after pasting it in i just select "invert colors" and the signature will be white or gray.
Then i scanned that paper and decided what signature i liked the best and isolated it. In Photoshop i fixed any out of place pixels and upped the contrast so there was only black and white.
Then i used the dreaded magic want tool, selected the background and deleted it. That way the signature would be transparent instead of always having a white background. Here is what it looked like when i was done.
 If the photo is dark where i want to put the signature then after pasting it in i just select "invert colors" and the signature will be white or gray.
12/11/2011
Welders Glass ND Filter
I was reading online about a cheap alternative to a Neutral Density (ND) filter to use for photography. An ND filter is basically sunglasses for your camera. It decreases the amount of light that gets through, thus allowing you to keep the lens open longer. Neutral density filters can cost as much as $400 for a really nice one.

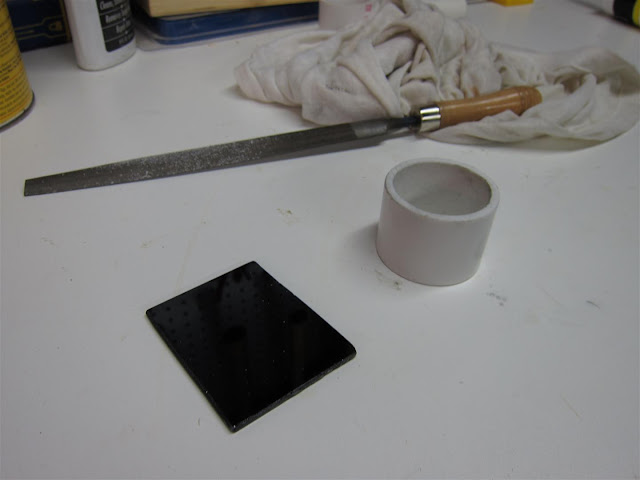
And make a type of "dark housing" to fit over the camera lens. I used a piece of PVC pipe and a permanent marker to color it black.
Then glued it together.
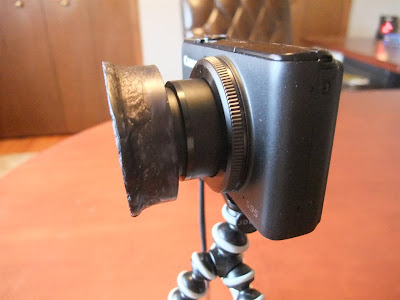
I used a rubber band to hold it onto the camera and some cloth on the edge so it wouldn't scratch anything.

The two main problems with using the welders glass is that it is not as high a quality as an ND filter and that it has a green tint. This is what the image looks like right out of the camera. This was a 64 second exposure during the day.
But in Photoshop this can be corrected, mainly by adjusting White Balance and Tint.
That design was not the best, it was too big and heavy. So i tried to simplify it.
I started with the same 2" square piece of glass that i cut from the larger glass. But then i used pliers as a kind of glass nippers and slowly broke off corners until it was round.

I sanded and filed the sharp edge. Then just as before i glued it to a PVC pipe i colored black, inside and out. But the key difference is this time is that i glued a foam ring to the inside of the PVC.


I sanded the foam down until i could slide it onto the outer lens, but with just enough pressure that it wouldn't fall off.

I plan to use it when i'm in Tennessee to take pictures of some waterfalls.
The cheap alternative is to use a welders glass. They type of glass that welders for eye protection against the bright light created during welding. So i went to Lowe's and bought one.

And make a type of "dark housing" to fit over the camera lens. I used a piece of PVC pipe and a permanent marker to color it black.
Then glued it together.
I used a rubber band to hold it onto the camera and some cloth on the edge so it wouldn't scratch anything.

The two main problems with using the welders glass is that it is not as high a quality as an ND filter and that it has a green tint. This is what the image looks like right out of the camera. This was a 64 second exposure during the day.
But in Photoshop this can be corrected, mainly by adjusting White Balance and Tint.
That design was not the best, it was too big and heavy. So i tried to simplify it.
I started with the same 2" square piece of glass that i cut from the larger glass. But then i used pliers as a kind of glass nippers and slowly broke off corners until it was round.

I sanded and filed the sharp edge. Then just as before i glued it to a PVC pipe i colored black, inside and out. But the key difference is this time is that i glued a foam ring to the inside of the PVC.


I sanded the foam down until i could slide it onto the outer lens, but with just enough pressure that it wouldn't fall off.


I plan to use it when i'm in Tennessee to take pictures of some waterfalls.
Subscribe to:
Posts (Atom)


