2/28/2017

Build Bunkbed From Bed Frames


Bunk Bed Plans - Build Dimensions


https://youtu.be/mipVu-hVmrA


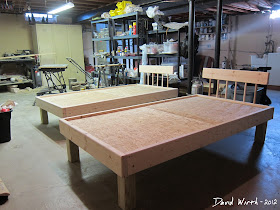
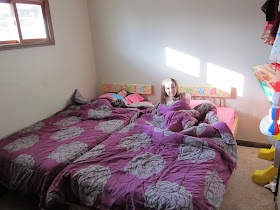
Several years ago i built two twin beds for Karrie's sisters.  Here's a link to that original blog post, including plans and dimensions.
twin bed frame, make build, cheap plans

I also made a headboard for a queen bed.

DIY - How to Make a Wood Headboard
https://youtu.be/pS8ufHocb20

And here's a link to that blog post, the headboard itself only cost $16.

The goal was to make a bed cheaply out of pine and particle boards from a store like Lowe's.
how to make a childs bed, bed frame, wood

I think i make both beds for about $50 each in materials.
easy to make twin beds, kid, child, baby


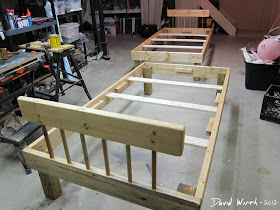
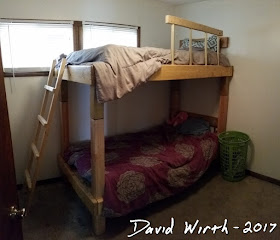
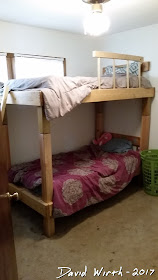
They were made with cheap pine lumber 2x4's, 2x6's and 4x4's.  They held up well but now they need more space in their rooms.  And since they are older, bunkbeds were the perfect option.  I figured that i could cheaply and easily turn their twin beds into bunkbeds by just replacing the bottom legs with longer ones.  There was more to it than that, but that's the basic idea.
simple bed frame

Here are the basic materials i used.
plans and materials to make a bed frame

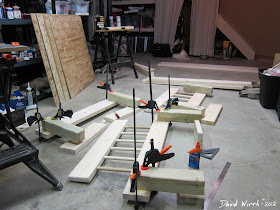
This was gluing up the headboards and top legs.
mock up frame pine wood bed

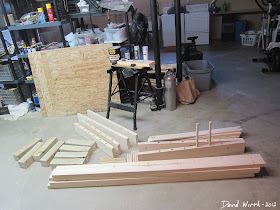
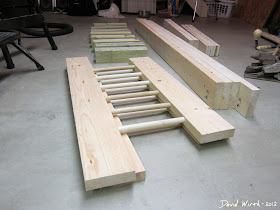
Here's the cut and finished parts, ready to assemble.
simple wood headboard, dowel, twin, queen, king,

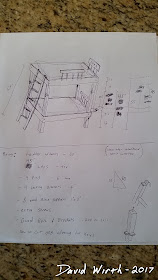
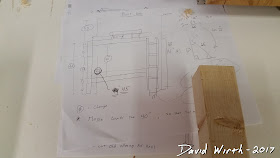
The first thing was to determine the height of a bunk bed.  I figured that the bottom bed would stay the same height off of the floor, which was about 12".  The height of the ceiling was 7'.  It took a while to determine the other spacing, from the bottom bed to the top bed then the top bed to the ceiling.
bunkbed plans, dimensions of bunkbed, bunk bed size

This was a good plan to have, it gave me the right spacing from the bottom bunk to the top.
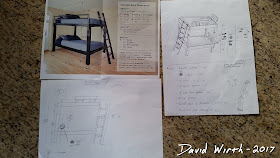
how big is a bunk bed, how tall is a bunkbed, bunkbed rail

This was my final plans to use for getting the spacing from the mattress to the upper bed.
bunkbed size, size of bunk bed, ladder, how to

Also i wanted to use two 8' 4x4 posts for the new legs.  That way all i would have to replace were the legs on the bottom bed, the top bed would stay the same.  After i determined the spacing i wanted, i had to "convert" the dimensions to work with the 12" top bed legs and 5.5" bed side board.

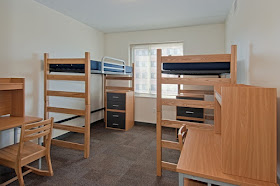
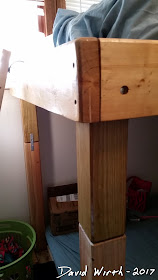
First i cut the 4x4 posts to length.  Then i drilled a hole in the top of the post.  That hole would be for a steel pin.  I took the same idea as the bunk beds they had at MSU, where the beds were joined with simple steel pins at each corner.
college bunkbed,

Here's the pin connections that they used.
metal pin for bed frame, bunkbed

 You can see that when the beds are pushed together you can't see the connection.
how to attach connect bunk bed , bunkbed

I cut some 1/4" steel rod to make the pins for the corners.

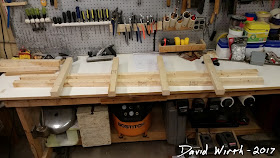
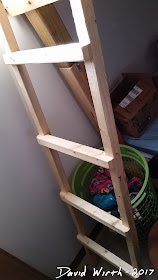
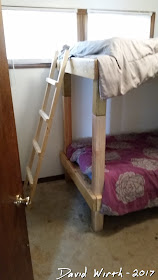
Next i made a ladder to get to the top bunk.  Again i used pine 2x4's ripped i half.  I notched the cross bars for the steps, then screwed and glued them in place.
bunkbed ladder, bunk bed, attach ladder

Here's the parts before putting it together.
make ladder for bed, bunkbed, bunk bed, make wood ladder

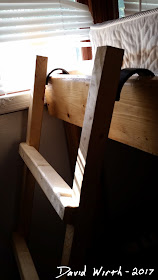
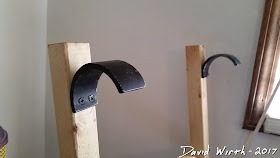
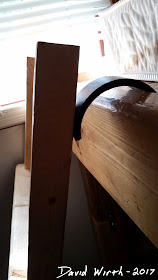
I didn't want to permanently attach the ladder to one spot, so i made hooks out of PVC pipe and attached them to the top of the ladder.  Hopefully that would keep it from falling backward when someone climbed up.
ladder hooks, pvc, wood

hooks for ladder, bed, bunk bed

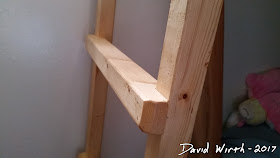
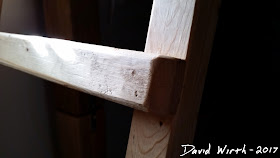
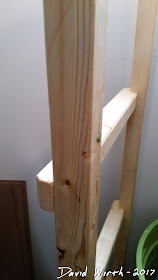
Here's the joint i used to connect the sides to the rails.
rabbit joints, how to make a wood ladder

simple yet strong wood joint

simple wood ladder, build plans, dimensions, nails, glue

wood ladder for bunk bed, buy ladder for bed

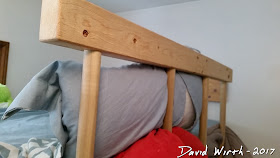
I also made a railing for the top bunk to keep anyone from falling out.  I made it the same way as i made the headboard with a 2x4 at the top and 1" dowels for the uprights.
top safety rail for bunkbed, bunk bed rail, falling out, prevent

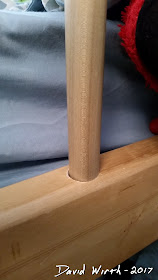
Here you can see how i had to drill into the top rail.
how to attach safety rail to bunk bed, bunkbed, fall out

Again i had to guess at the height above the mattress that it needed to be.

Once done, i sanded and polyurethaned everything.
simple, cheap, bunk bed, bunkbed, make wood

how to make a bunkbed, make a bunk bed, build bed, wood bunk bed

The rest of the work i had to do at the house to the old bed.  Once there i drilled matching holes for the steel pins in the bottom of the legs for the top bunk.  Then i drilled the holes in the side rail for the new railing.  I glued and tapped the new railing in place.
metal latch connect beds, bunkbeds

I used a jigsaw to cut out notches for the new 4x4 legs to extend through.  I used the old legs as templates and drilled new holes in the 4x4 posts for the steel bolts.  Bolted on the new longer bottom legs and then lifted the top bed onto the pins.
simple bunk bed, make bunkbed, dimensions, size

Just in case, we added metal brackets to prevent the top bunk from coming apart.  Then with the ladder in place it was all done.  Giving a lot more room for the girls.

2/27/2017

Plastic on Windows - Save Money in Winter - Heating Bill

The windows in our house have always been bad.  They are cheap plastic and don't shut properly.  There are a couple where i can't even get both latches to close.  That's fine if you live somewhere warm, but becomes an issue in January here in Michigan, when it's 5 degrees outside.  And in past years, during the winter, i could definitely feel cold air leaking in at the window seams.


Plastic Window Insulation - Does it Work?

https://www.youtube.com/watch?v=j670njs5Hjg


So this year i tried to do something about the leaky windows and high heating bills.  I thought i'd try putting plastic over the windows to stop cold air from leaking in.
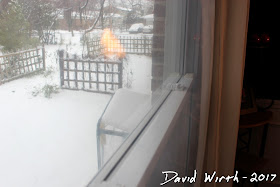
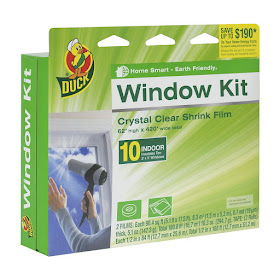
So i went on Amazon and bought the Duck Brand 10 Window pack for $11.
amazon window plastic, duck, window kit, save money

There were thousands of reviews and they said it was pretty good.  The kit came with two large sheets of plastic and two rolls of double-stick tape.  After skimming through the instructions i saw that you should measure your windows and cut the plastic - adding 2" on either side.
duck brand window kit, insulation, winter

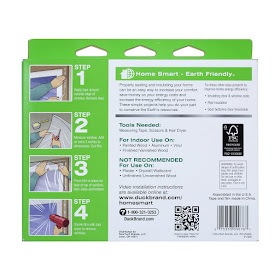
Instructions to install plastic window kit.
how to install window kit, insulation ,plastic

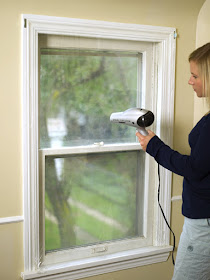
Heat shrink the window film.
heat shrink, hair dryer, plastic window insulation

Unroll plastic window film.
how to install window insulation, save money on heating bills


Attach plastic to double stick tape.
double stick tape plastic, window cover, wrap

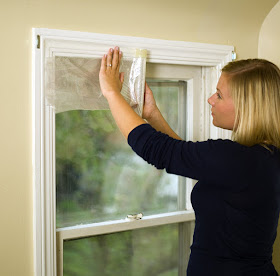
So i started by putting the double-stick tape on all the windows.  I decided to put it on the plastic window frame not the wood molding.  I figured that way it would be easier to remove the tape without pulling off any paint.
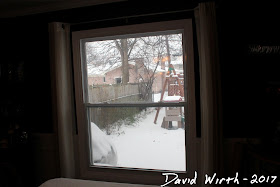
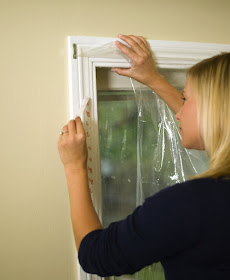
Next i started putting up the plastic.  I measured each window then just cut the plastic for height, not width.  It was pointless to cut the width because it's not like you will have enough to reuse.  So i put the plastic up, pushing hard onto the tape as i went along, starting from the top and working down.  Then i used a utility knife to trim everything afterwords.


leaky window, window seal, crack, winter, cold air

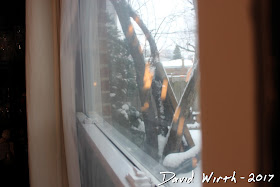
Here you can see the plastic bulging out as the cold air is leaking through the window, but the plastic is doing it's job and keeping the cold air out.
Bulging plastic over windows

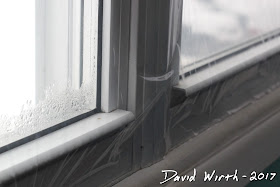
This window was not heat shrunk, but you can tell that the cold air is trying to leak in.
plastic window film

This is the double stick tape that comes in the kit, you get 2 rolls of these.
double stick tape, duck brand, extra tape, window film

I was able to cover about 12  windows of about this size.
typical window size, size, dimensions, plastic size, 5'


plastic on window frame, humidity, heat, furnace, heating bill

I was able to cover around 12 windows in my house.  Some were double wide windows and some were small half size ones.  But i would say that 10 windows was an accurate number on the box.

They say in the instructions to use a blow dryer to tighten the plastic up, but i didn't do that.

It may be the placebo effect but it definitely feels warmer in some rooms.

My plan was to do this, then check past heating bills to see how much i saved, but i realized that that wasn't possible.  There's too many variables to get accurate numbers to compare.  Maybe we have the thermostat set at different temps, maybe it was colder/warmer this month vs last year.

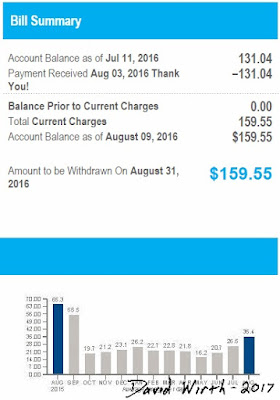
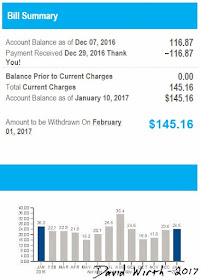
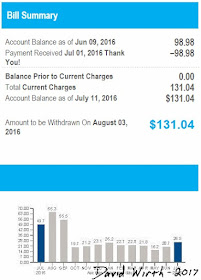
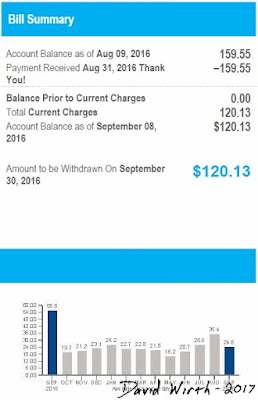
See all the bills below.  For non-scientific data.

But i do know that the plastic window kit is working for two reasons.  First because the plastic on the bad leaky windows is all bulged out.  That's because those windows that do leak are letting cold air in at the seams and the plastic is being pushed inward.  Window's that i know are tight, the plastic is slack.  And second, i cannot feel any cold air around the edges of the plastic, where i could last year.  The plastic has sealed the cold air from coming in.

It does take several hours to put everything up, but it's definitely worth it, and i know its paid for itself.


heating bill, furnace, electric, winter, save money, summary, how to
heating bill, furnace, electric, winter, save money, summary, how to, lower your bill


lower your heating bill in the winter, cold air, leaky windows


consumers energy bill, lower heating bill, heat bill

how to lower your heating bill


cover your windows to lower your heating bill


lower bill for free

2/23/2017

Free Humidifier in Winter - Towel Over Heat Vent

When the furnace in our house runs it always seems to blow dry air.  Even when i turn up the furnace mounted humidifier, the air coming out upstairs is dry.  That means that in the winter, when the furnace runs overnight, everyone's nose and throat drys out and get more susceptible to getting sick.


Free Humidifier for Bedroom


https://www.youtube.com/watch?v=LOHIbUCxf6k

We do have a small humidifier in our bedroom and our son's bedroom.  But the problem with that is we are trying to combat the dry air with humid air.

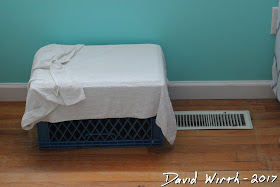
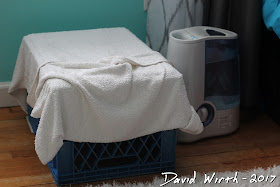
A free solution to that problem is something i learned while working out of town and staying in hotel rooms.  When we had an in-the-room heater that blew hot dry air, we would put a wet towel over the vent.  That would force the dry air through the wet towel, and it made a huge difference.  So i decided to try that at home.  Instead of just putting the wet towel right on top of the floor heat vent, i decided to use a milk crate.
free humidifier, wet towel on heat vent, milk crate, winter, air, blow


That way i would get more surface area for the air to blow through and also get the wet towel up off the floor.  We also have hard wood floors in both bedrooms.  If you are doing this in a room with carpet you might want to put some sort of plastic garbage bag down first.  Because you want the towel to be very wet, pretty much to the point of slowly dripping.

8 hours later, the next morning the towel is dry as a bone.  When we lift it off the milk crate the towel keeps its square shape.
dry air furnace, blowing, vent, wet towel, bedroom, humidifier

I have definitely noticed a difference and know in the morning when i forget to wet the towel.

It's just a cheap (free actually) way of keeping a room in your house humid through the winter months.

3D Printer Setup - Monoprice MP Select Mini

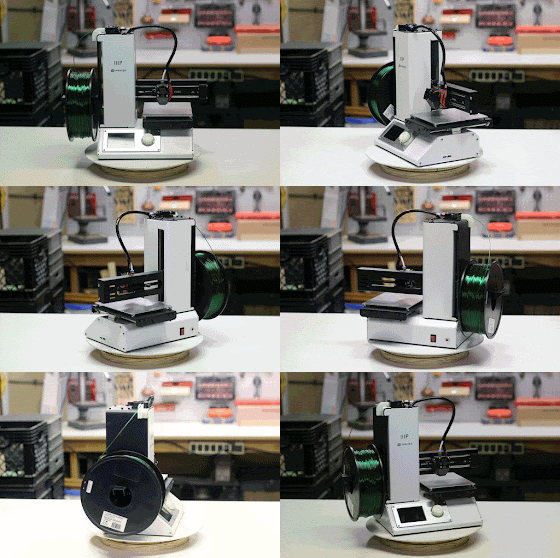
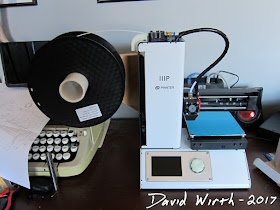
Previously i wrote about why the Monoprice MP Select Mini is a great first 3D printer. 3D printers haven't been around on the consumer level for very long, so most people that own them are considered beginners. The MP Select Mini is a great combination of simplicity, quality, and at a low entry level cost.
monoprice select mini, mp select, malyan m200, 3d printer, beginner printer


Monoprice Select Mini - 3D Printer Setup - First Print

https://www.youtube.com/watch?v=hFeCo2gNciI


More 3D printing blog posts and video's i've done or will do:
BLOG YOUTUBE
1 - Introduction to 3D Printing 1 - Introduction to 3D Printing
2 - Best Beginner 3D Printer 2 - Best Beginner 3D Printer


So if you are someone who just bought this printer and are looking to see how i set it up for my first print, here's what i did.
MP Select Mini, amazon, price, $200, best, review
First take it out of the box, remove all the tape and plug in the power supply.
setup 3d printer, first print

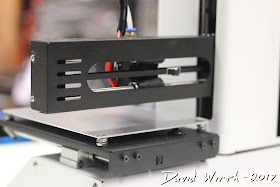
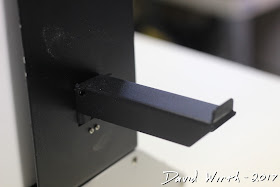
Then snap in the filament support arm.
metal filament arm, holder, simple, attach

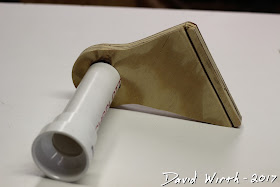
I'm not really happy with the design of the metal filament arm, i made an improved design that mounts the filament parallel to the printer rather than 90 degrees, which allows it to feed much smoother.
make adjustable wood filament arm, spool holder, basic, easy, print, 3d print, pvc


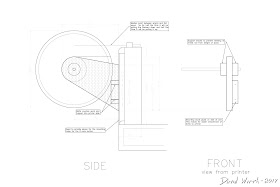
I will make a blog post and upload a video later about this filament arm.  Here's some plans i drew up on AutoCAD.
autocad plans for filament holder, 3d print, spool, roll, bearing

Here's what it looked like when it when i was mocking it up.
connect filament to 3d printer, pla, roll, spool

To load the filament (either a 1kg roll you bought or the free sample they provide) squeeze the spring arm and feed the end of the filament through the hole, along the metal wheel, and through the other hole into the plastic tube. Continue feeding the filament until it comes to a stop down by the extruder. Now it's time to level the bed and for this you will have to turn the printer on. But before you do that i would recommend checking that there are no loose connectors. I had the problem initially where the Z-axis switch connector was loose. When i pressed the home button the nozzle went to home and then kept going into the bed. There was a terrible grinding noise and i had to turn the printer off. After an hour of trouble shooting i realized that the Z-axis switch (visible on the far left of the machine between the metal supports) wasn't in all the way. It is a crappy loose connection. So i recommend you check that it's pushed in tightly.
mp select mini, z axis switch, connection, button, x axis, y axis

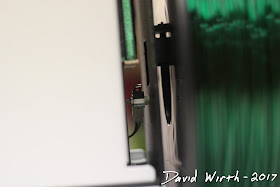
Also you should check that the fan shroud is centered on the heat sync. If it's shifted to the left then this will also cause terrible grinding because it will hit against the metal upright before the X-axis switch is pressed.
printing on glass bed, 3d print, adhesion, pla, mp select mini

You can see here that the fan shroud is lined up correctly on the mount.
3d printer alignment, how to, bed level
But you will know everything is ok if you go into the menu, click on Home and the nozzle goes to 0,0,0 fairly quietly.
3d printer menu, how to, mp select mini, temp, heat, bed
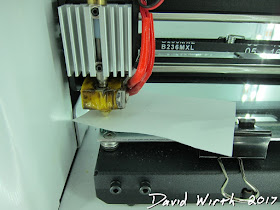
Once you do that it's time to check the level. Using an ordinary piece of paper, (some people use a business card) slide it between the nozzle and print bed. There should be a tiny amount of friction, not too tight but a small amount of force to slide it. Adjust the screws with the provided allen wrench. A tiny amount of adjustment makes a big difference.
3d printer, easy bed level, adjust


Use a standard piece of paper to get the thickness.  You want the first layer of filament to be sort of "smushed" to the build plate.

paper spacing, 3d printer, level bed, nozzle
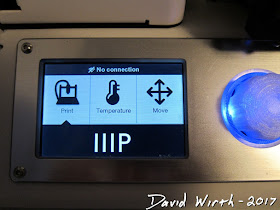
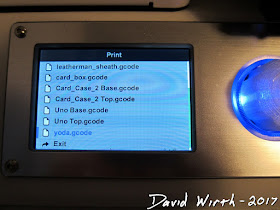
Then slide the bed back to check the back left corner. Then to check the other side of the bed, click on the X-axis button in the menu and turn the dial until the nozzle is at the other end. Then repeat the steps for front and back to check the level. You will have to then go back to the left side and check those again as well. It also doesn't hurt to check at the center of the print bed. Once that's done you are ready to print. A quick explanation of the menu's. The left menu is the file and print menu. This is where it shows you what's on your MicroSD card.
print menu, 3d print, .gcode, .stl, .obj, file
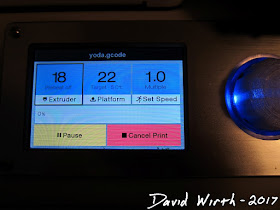
Clicking (by pushing in button) the file will go to the printing menu. Note: you have to load .gcode files directly to card, cannot be in a separate folder on the card or it won't print. The file will not start printing until the specified temperatures are reached, so don't get worried if it doesn't start right away.
mp select mini, print menu, extruder, pause, cancel, preheat, platform, set speed
The middle menu deals with the temperatures for the extruder and bed. I always like to preheat the extruder and bed before any print. It's not necessary but good practice to get everything warmed up to check that the filament is flowing before just jumping right into printing.
preheat 3d printer, best results, how to
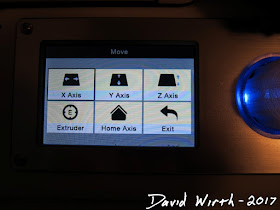
The right menu is the navigation, home and extrude menu.
navigation menu, best 3d printer menu, home, axis, x, y, z, extruder
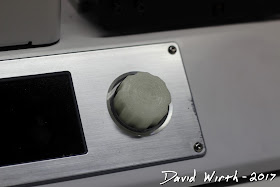
This is where you can move the nozzle to home, move in the X, Y, and Z direction. Also you can manually feed the filament through the nozzle, but remember that you have to preheat the extruder first or else it will just make a grinding noise as it tries to push it through. If this is your first ever print you should feed some filament through at 210 degC to make sure there's no blockages. Now the specifications for this printer say that it is a touch screen...it is not. It would be nice if it was, but it's not a huge deal. Although the button is a real pain to use. I recommend 3D printing a new thicker/raised button.
3d print new button for 3d printer, mp select mini, monoprice
It's a little tricky to replace but a good tip is to use a toothpick to push dental floss behind the button, then slowly work it around while lifting up. It takes some time but eventually pops off. Another thing it says is that the printer has WiFi...it does not. However it is possible to add WiFi to it by flashing the firmware. I have no reason to want to print using WiFi, i'm fine with the MicroSD card, but you can install new software which allows you to control it with your phone or laptop.
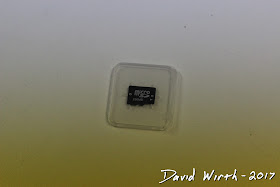
The printer comes with a 256Mb MicroSD card, but it can be a pain only being able to have 5 or 10 files on it at once. So if you see a good deal, like $5, i would recommend getting a 1Gb or 2Gb card.
micro sd card that comes with monoprice select mini
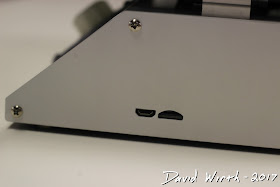
Or you can buy a 6" cable that that has a MicroSD Male end and SD female end. This way you can use a regular SD card and probably don't have to buy one. I ended up buying a MicroSD to MicroSD cable.
You can also hook the printer up to your computer directly and send the prints directly from your slicer program, like Cura. But again, i'm ok with using the card, plus if your computer freezes up for any reason, your print can get screwed up. Using the card seems like the most stable process.
card slot, monoprice, select
Now you are ready to print. For a first print it's probably a good idea to print one of the two .gcode files that is already on the MicroSD card. Later on you can learn about converting 3D .stl or .obj files you download online into .gcode using design software and slicer programs like Cura, Slic3r, Simplify3D, or KissSlicer.
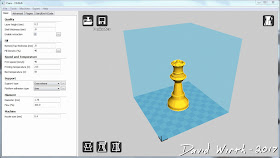
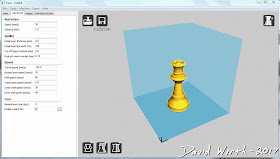
cura settings, basic, advanced, baseline, preset, pla, petg

There's tons of different settings to learn.  You learn as you print more, then try to fix the mistakes.  Some settings are very important, others are for making minor tweaks.  
how to use cura, simplify 3d, settings, part, bed, size, temp
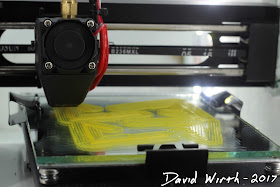
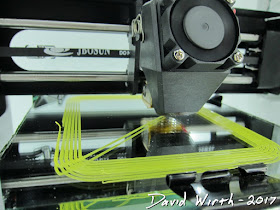
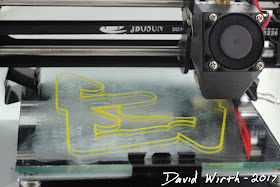
If i remember there was this little alien guy and an elephant. If you only have the sample filament you can only print the alien guy. So go into the left menu, click on that file and it will go to the printing menu. Again, it will take some time before printing, until the target temperature is reached for the extruder and heated bed. Once everything's reached temperature the printing will start. Now the first row is critical to get good adhesion with the print bed. It should be printing a Brim around the object, so have some needle nose pliers or long tweezers ready, and if the filament clumps up or gets stringy, it's ok if you have to pull pieces off. Just get everything set so when the actual part starts printer it's all good.
how to get good bed adhesion, 3d printer, glass, nozzle
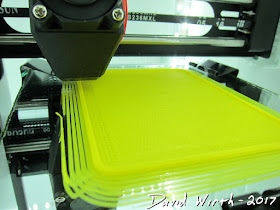
Here is the brim being printed, the outer layer away from the actual part.
brim settings, 3d printer, layer, glass bed
For more on the tools and tips to getting a good first layer check out my other post and video:
tools and materials needed for 3d printer, 3d printing, tape, pliers, glue, acetone
This is one of my first glass beds i used. I will record a video and make a blog post about using a glass bed on the MP Select Mini.
adding glass print bed to mp select mini, monoprice, how to
Hopefully everything goes well, it finishes printing and looks ok. The more you print, the more you will learn about settings and techniques and all the little things to get better and better prints.